


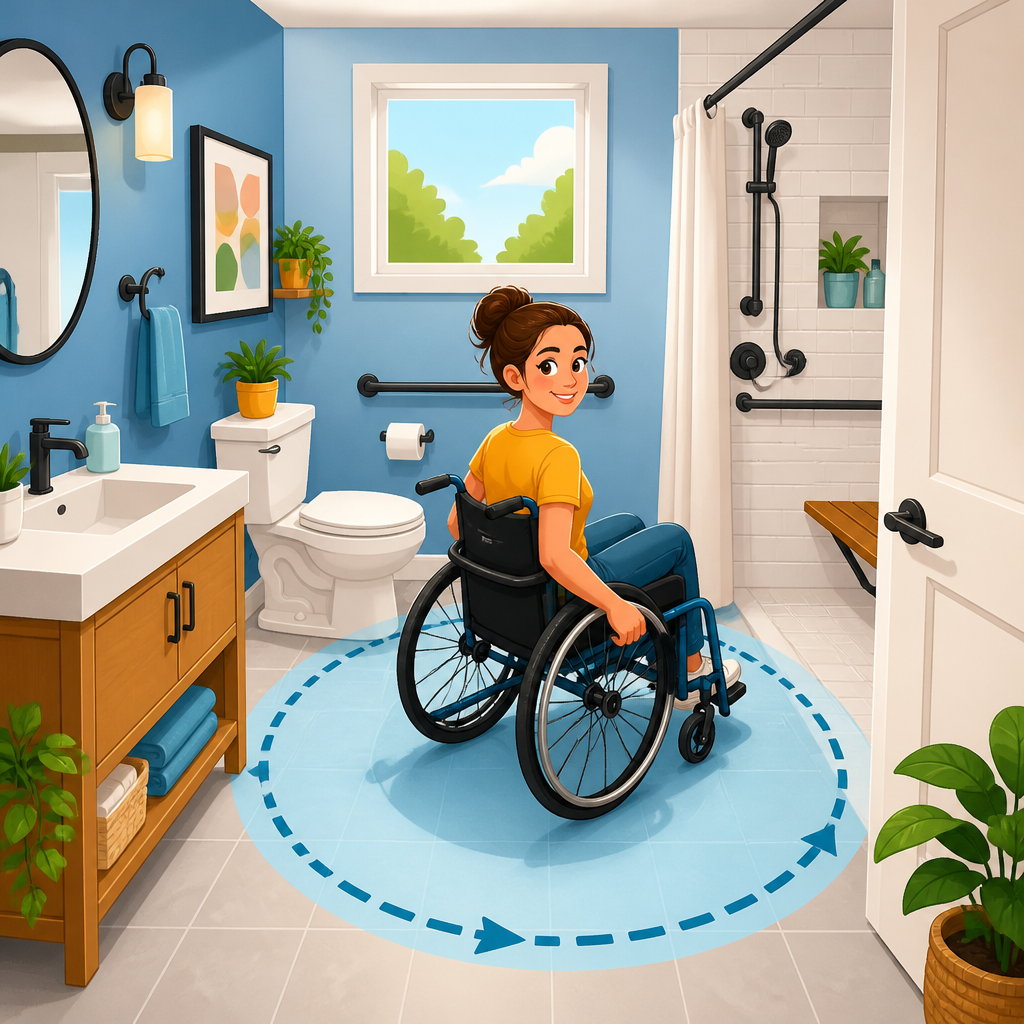
Creating a wheelchair turning space in a small bathroom starts with understanding one hard fact: most existing bathrooms were never designed for the clearance, reach ranges, and maneuvering room that wheelchair users need every day. In renovation work, I have seen bathrooms that looked functional on paper fail completely in real use because the sink projected too far, the door swung into the only usable floor area, or a toilet placement forced a three-point turn. A wheelchair turning space is the clear floor area that allows a user to rotate and reposition safely, typically a 60-inch diameter circle or a T-shaped turning area recognized in accessibility standards. In a small bathroom, achieving that space is not just about comfort. It affects independence, transfer safety, caregiver access, and whether the room can be used without strain or risk. This matters across the wider category of bathroom and bedroom accessibility because bathrooms are usually the tightest rooms in a home, while bedrooms often connect directly to them through daily dressing, toileting, bathing, and nighttime mobility routines.
For homeowners, caregivers, contractors, and occupational therapists, the challenge is balancing code guidance with real buildings. Older homes may have load-bearing walls, plumbing stacks, or narrow joist bays that limit what can move. Renters may need reversible changes rather than full reconstruction. People using manual chairs, power chairs, walkers, or transfer benches also need different layouts. A practical hub article has to answer more than one question: how much turning space is required, what fixtures usually block it, whether a wet room helps, how bedrooms should connect to bathrooms, and which upgrades deliver the most mobility benefit for the budget. The good news is that even very small bathrooms can often be reworked by removing conflict points, shrinking fixture footprints, and rethinking the entry sequence. The goal is not abstract compliance. The goal is a bathroom and bedroom accessibility plan that works every morning, every night, and in emergencies.
Start With the Required Turning Space and User Dimensions
The first step in any small bathroom redesign is measuring the wheelchair user, the mobility device, and the room itself. Standard guidance commonly uses a 60-inch turning circle or an equivalent T-turn, but that is a baseline, not a guarantee of comfort. Many power wheelchairs need more practical swing room because footplates extend forward and turning radii vary by model. Bariatric chairs, tilt-in-space chairs, and scooters usually require even more clearance. I always measure overall chair width, length with footrests, hand reach, transfer side preference, and whether the user turns independently or with assistance. Those details decide whether a nominal 5-foot circle will function in reality.
Measure the room in plan view and note every projection: baseboards, radiator covers, vanity corners, toilet paper holders, door trim, and even the swing path of a hinged shower screen. The most common mistake is measuring wall to wall and assuming all floor area is usable. It is not. Turning space must be clear at floor level, and overlapping clearances only work when fixtures allow knee or toe space where standards permit. In small bathrooms, inches matter. A wall-hung sink can recover usable turning area because the user can partially occupy the space beneath it. A deep vanity usually cannot. Accurate dimensions create the design brief for all bathroom and bedroom accessibility decisions that follow.
Identify the Fixtures and Features That Steal Maneuvering Room
In almost every tight bathroom, three elements consume the turning space first: the vanity, the door swing, and the bathtub. Standard vanities are frequent offenders because they are deep, boxy, and placed directly opposite the toilet or shower entry. Replacing one 21-inch deep vanity with a compact wall-hung sink can transform circulation. A traditional tub also dominates floor area while offering the worst transfer conditions for many wheelchair users. Converting a tub to a curbless shower often creates the biggest single gain in usable mobility space.
Doors deserve special attention. An in-swing bathroom door can wipe out the only turning zone in a small room. In renovation projects, switching to an outswing door, pocket door, or surface-mounted sliding door is often the simplest path to a workable layout. Pocket doors save floor space, but they must be detailed carefully around plumbing walls, blocking, and hardware height. Surface sliders avoid opening the wall, though they need adjacent wall area and may have lower acoustic privacy. Bedrooms linked to accessible bathrooms should also be reviewed the same way. If the bedroom door, closet doors, or bed placement create pinch points, the accessible bathroom will still be hard to use during dressing and nighttime trips.
Choose a Layout Strategy That Preserves a Clear Turning Zone
Once obstacles are identified, the best design approach is to protect one continuous zone of clear floor area and arrange fixtures around it. In small rooms, that often means placing the toilet and sink on one wall and using the shower area to overlap turning clearance when the shower is curbless and unobstructed. This overlap is common in effective universal design because the shower floor can double as maneuvering space when it is level, slip resistant, and drained correctly. Linear drains are useful here because they simplify floor slope and make rolling access smoother.
Another strategy is to shift fixture positions to corners that reduce conflict. A corner sink can free central space, but only if it still provides proper approach and usable controls. Wall-mounted toilets can help because their carriers hide in the wall and their projection may be shorter, although structural and plumbing costs are higher. In some cases, stealing a few inches from an adjacent closet, hall, or underused bedroom alcove is the difference between a frustrating compromise and a genuinely accessible room. That is why this topic belongs within bathroom and bedroom accessibility as a connected hub. Space planning cannot stop at the bathroom doorway.
| Constraint | Typical Problem | Practical Solution | Main Benefit |
|---|---|---|---|
| In-swing door | Blocks turning area | Use outswing or pocket door | Recovers clear floor space |
| Deep vanity | Reduces approach and rotation | Install wall-hung sink | Adds knee space and maneuverability |
| Bathtub | Difficult transfer, large footprint | Convert to curbless shower | Improves access and overlaps turning zone |
| Narrow room width | Chair cannot pivot cleanly | Borrow space from closet or hall | Creates workable circulation |
| Bedroom pinch points | Access fails before bathroom entry | Reposition furniture and widen path | Supports whole-route accessibility |
Select Space-Saving Fixtures Without Creating New Barriers
Compact fixtures only help if they remain usable. I have seen designers specify stylish small sinks with beautiful shallow basins and then mount faucets so close to the backsplash that users cannot operate them. Good accessible fixture selection means checking reach range, lever use, underside clearance, and transfer geometry. Wall-hung sinks, offset drains, insulated pipes, and single-lever faucets are proven choices. Mirrors should either tilt or extend low enough for seated users. Storage should move to recessed medicine cabinets, open shelving at reachable heights, or bedroom storage solutions that reduce what must be kept in the bathroom.
Toilets need more than side clearance. Seat height, flush control location, transfer side access, and grab bar placement all affect usability. A “comfort height” toilet often helps adults with limited mobility, but exact height should match transfer needs. Showers should favor zero-threshold entry, trench or linear drainage, handheld shower wands on slide bars, pressure-balanced or thermostatic mixing valves, and fold-down seats when independent standing endurance is limited. The floor finish matters as much as the fixtures. Choose slip-resistant tile with enough texture for wet traction but not so aggressive that it impedes cleaning or rolling resistance. Small mosaic tile is often effective on shower floors because the grout joints increase traction.
Build Safety Into the Room With Grab Bars, Lighting, and Reachable Controls
Turning space alone does not create accessibility. The room must support safe transfers, stable movement, and easy operation. Grab bars should be planned early, not added as an afterthought, because blocking within the walls allows correct placement and stronger installation. Placement varies by user needs, but toilet side bars, rear bars, and shower bars are foundational. Some users do better with angled bars that support sit-to-stand movement, while others need vertical bars at entries for hand placement during pivot transfers. The right setup comes from actual use patterns, not generic diagrams.
Lighting and controls are just as important. Bathrooms and bedrooms used at night need even, glare-controlled lighting with switches at accessible heights and clear paths to the toilet and sink. Motion-sensor night lighting can reduce fall risk without requiring fine motor control. Anti-scald protection is essential because reduced sensation or slower reaction time increases burn risk. Ventilation also matters more than people expect. A wet room or curbless shower that remains damp can create slip hazards, mold, and maintenance issues if the exhaust fan is undersized. Good accessibility design is always operational, not decorative.
Connect Bathroom Access to Bedroom Layout and Daily Routines
Because this article is the hub for bathroom and bedroom accessibility, it is important to treat the route between those spaces as one system. A perfectly designed bathroom is still a failure if the wheelchair cannot approach from the bed, if clothing storage is inaccessible, or if nighttime transfers require navigating rugs, thresholds, or sharp furniture corners. In practice, I review bed height, transfer side, bedside clearance, closet access, lighting controls, and the width of the path to the bathroom before I finalize bathroom plans. Those decisions directly affect fatigue and independence.
For example, a person who transfers from the left side of the chair may need the bed positioned so the easiest nighttime route aligns with the bathroom door and toilet transfer side. A bedroom with a narrow foot-of-bed passage may force a difficult backing maneuver before the bathroom is even reached. Removing one dresser, changing the bed orientation, lowering closet rods, or adding a second accessible storage zone can relieve pressure on the bathroom. This is why the most effective accessibility upgrades often look modest. They reduce cumulative effort across the whole routine of sleeping, dressing, toileting, and bathing.
Plan for Costs, Building Limits, and the Right Professionals
Small accessible bathroom renovations range from targeted modifications to full gut remodels. Replacing a vanity, changing a door swing, adding grab bars, and improving lighting may be relatively affordable. Moving plumbing, widening walls, recessing shower bases, or installing wall-hung fixtures can raise costs significantly. In older homes, hidden conditions such as cast-iron drains, unlevel framing, asbestos-containing materials, or inadequate floor structure can change the budget quickly. That is why early investigation is worth the time. A contractor experienced in accessible remodeling will look beyond finishes and identify these constraints before demolition starts.
When the project is user specific, an occupational therapist or certified aging-in-place specialist can provide practical guidance on transfer patterns, seat heights, and equipment compatibility. Plumbers, electricians, and tile installers also influence whether the final room works. For example, a curbless shower needs correct recessing or floor buildup, waterproofing, and slope control; if any of those are wrong, the accessible feature becomes a drainage problem. Ask for drawings with dimensions, not only inspirational photos. Check product cut sheets. Confirm rough-in heights. The difference between a compliant-looking room and a genuinely usable one is usually found in those technical details.
Creating a wheelchair turning space in a small bathroom is absolutely possible, but it succeeds only when clear floor area drives every decision. Start by measuring the wheelchair user and the actual room, including every projection that affects maneuvering. Then remove the biggest conflicts first: the in-swing door, the oversized vanity, and the bathtub that monopolizes floor area. Protect one usable turning zone, overlap space intelligently with a curbless shower when appropriate, and choose fixtures that remain truly operable from a seated position. Add strong grab bars, safe lighting, slip-resistant flooring, and anti-scald controls so the room works under real daily conditions, not just in a drawing.
Most importantly, treat bathroom and bedroom accessibility as one connected system. The accessible route from bed to toilet, sink, shower, and storage determines whether the user can move independently with less effort and lower risk. Good design may involve construction, but it also includes furniture layout, door strategy, storage placement, and honest budgeting around building limits. If you are planning a remodel, begin with measurements, list the user’s transfer and mobility needs, and review the entire bedroom-to-bathroom routine before choosing products. That process will help you create a small bathroom that turns easily, functions safely, and supports long-term independence.
Frequently Asked Questions
What size turning space does a wheelchair user typically need in a small bathroom?
In most cases, the best starting point is a clear turning circle of about 60 inches in diameter, or a comparable T-shaped turning area that allows a wheelchair user to rotate and reposition without getting trapped by fixtures. The key word is clear. Many bathrooms appear to have enough square footage until you account for the toilet, vanity corners, door swing, storage cabinets, and baseboard heaters that reduce usable floor space. A wheelchair turning space is not just an empty spot on a floor plan. It is the actual open area a person can use while moving through the room, approaching fixtures, and changing direction comfortably.
In a small bathroom, the practical goal is often to preserve as much uninterrupted floor area as possible in the center of the room or between the sink, toilet, and shower. That may mean using a wall-mounted sink, choosing a shallower vanity, relocating the toilet a few inches, or replacing a standard tub with a roll-in or low-threshold shower. It is also important to remember that some wheelchair users need more than the minimum guideline depending on chair size, footrest length, turning style, and whether they use powered mobility equipment. If you are renovating for a specific person, real-life measurements and trial layouts matter more than assumptions based on standard dimensions alone.
How can I create wheelchair turning space if my bathroom is extremely small?
When a bathroom is very tight, the solution usually comes from removing conflicts rather than simply trying to find extra room. The most common obstacles are bulky vanities, inward-swinging doors, oversized tubs, and fixture placements that break up the only open floor area. One of the most effective changes is replacing a traditional swinging door with a pocket door or an outswing door, because that immediately frees interior floor space that can be used for maneuvering. Another high-impact upgrade is switching from a deep vanity cabinet to a wall-hung sink or a compact vanity with knee clearance underneath.
You can also gain valuable turning room by rethinking the shower or tub area. In many small bathrooms, a tub consumes too much depth and limits circulation. Replacing it with a curbless or low-threshold shower can open the plan and improve usability at the same time. Toilets may also need to be repositioned so the user can approach and transfer more easily without blocking movement paths. Even moving a fixture a few inches can make a major difference when the room is operating on tight tolerances. In some remodels, the best answer is stealing space from an adjacent closet, hallway, or linen cabinet. Small bathrooms rarely become accessible through one change alone. The best results usually come from a combination of smaller design decisions that work together to create a usable turning area.
Does the bathroom door really make that much difference in wheelchair maneuverability?
Yes, absolutely. In many small bathrooms, the door is one of the biggest reasons the space fails in everyday use. A standard in-swing door can occupy the same area that a wheelchair user needs for turning, backing up, or positioning near the sink or toilet. On paper, the room may meet minimum dimensions, but once the door opens, the usable floor area disappears. This is why door planning is often one of the first things addressed in an accessibility-focused bathroom remodel.
A pocket door is often the most space-efficient choice because it eliminates the interior swing entirely, but it must be installed properly and should be easy to operate with limited hand strength. If a pocket door is not possible because of plumbing, wiring, or wall structure, an outswing door is often the next best option. Wider door openings also help reduce awkward angles when entering or exiting the room. In addition, lever handles are usually easier to use than round knobs. The door should work with the user’s movement pattern, not against it. In a small bathroom, improving the door setup can be the difference between a room that feels cramped and frustrating and one that is actually functional for wheelchair use.
Which bathroom fixtures and layout choices help preserve turning space the most?
The fixtures that usually have the biggest impact are the sink or vanity, the toilet, the shower or tub, and any storage that projects into the room. Wall-mounted sinks are often a strong option because they can provide knee clearance and reduce visual and physical bulk. If a vanity is preferred, choosing a shallow model with rounded corners can help maintain circulation. Toilets should be placed to allow a realistic approach and transfer, not just squeezed into whatever space remains. A toilet that is technically installed but difficult to reach or use safely is a design failure regardless of how well it fits the plan.
Showers are another major factor. Curbless showers or low-threshold shower entries usually support better movement than traditional tubs, especially in compact rooms. Recessed shelving, built-in niches, and wall-mounted accessories can also help by keeping storage available without consuming floor area. Overall, the most successful layouts tend to keep the center or primary maneuvering zone as open as possible. That often means placing fixtures along the perimeter, limiting projections, and choosing compact models that do not sacrifice usability. It is also wise to think beyond turning alone. Reach ranges, grab bar placement, faucet controls, mirror height, lighting, and slip resistance all affect whether the bathroom works well once the turning space has been created.
Should I follow ADA guidelines exactly when designing a wheelchair turning space in a home bathroom?
ADA guidelines are an excellent reference point, but in a private home they should usually be treated as a baseline rather than the final answer. The ADA was developed primarily for public and commercial accessibility, so while its dimensional guidance is useful, residential bathrooms often need to be customized around the actual user, the existing structure, and the realities of remodeling an older home. A layout that technically matches a standard diagram may still feel awkward if the wheelchair is larger than average, if the user transfers differently, or if a caregiver also needs room to assist.
The smartest approach is to use recognized accessibility guidelines to establish safe minimums, then test the design against real-world use. Measure the wheelchair, note turning habits, evaluate reach heights, and consider how the person enters, parks, transfers, and exits. It is also worth planning ahead if needs may change over time. Features such as reinforced walls for future grab bars, a curbless shower, wider doorways, and better floor clearance can make the bathroom more adaptable later. If possible, work with a contractor, designer, or occupational therapist who understands accessible residential layouts. In small bathrooms especially, precision matters. A thoughtful customized plan will almost always perform better than a generic layout copied from a standard alone.