Comparing DIY kits for budget stair lift installation starts with a simple reality: the cheapest stair lift is not always the most affordable once fit, safety, warranty coverage, and long-term service are included. In this buying guide, “DIY kits” means stair lift packages marketed for homeowner installation, partial self-installation, or low-cost setup using preconfigured rails and modular parts. “Budget-friendly options” means solutions that lower upfront cost without creating expensive failures later. I have reviewed lift quotes, spoken with installers, and seen used units save families thousands when the rail matched the staircase and the owner understood the tradeoffs. This matters because a professionally installed stair lift often costs far more than many households expect, yet mobility needs usually cannot wait. A clear comparison helps buyers cut costs responsibly, avoid misleading listings, and choose a kit that fits both the staircase and the user.
What counts as a DIY stair lift kit and who should consider one
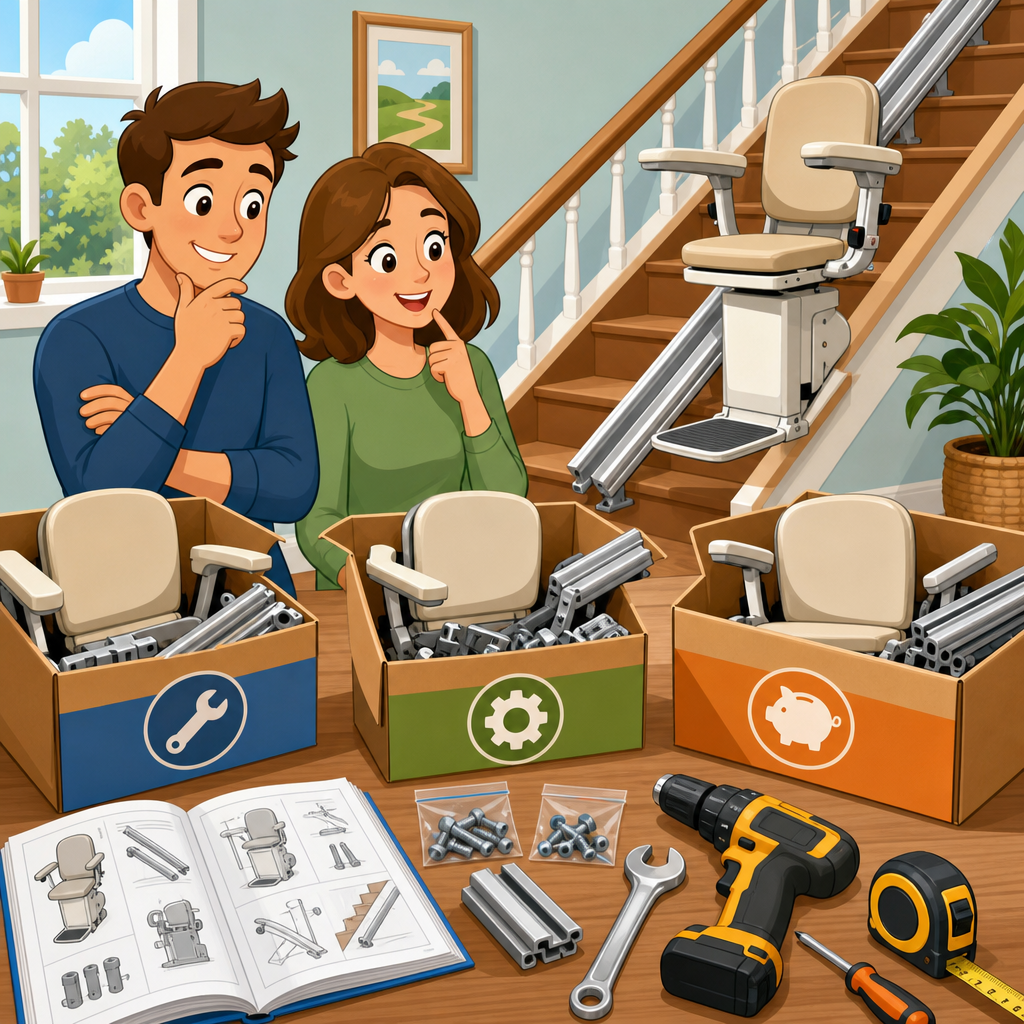
A true DIY stair lift kit is usually a straight-rail system shipped in sections with mounting brackets, carriage, seat assembly, call stations, charging points, and an installation manual. Most budget models are designed for straight stairs because the rail can be cut or ordered to standard lengths. Curved stair lifts are rarely realistic DIY purchases; they depend on custom rail fabrication based on detailed measurements or digital surveys, and manufacturing errors are costly. For that reason, budget stair lift installation discussions should begin with a key distinction: straight stairs create genuine low-cost options, while curved stairs usually do not.
The buyers best suited to a DIY or semi-DIY kit typically have a standard straight staircase, a nearby power outlet, a helper who can manage heavy components safely, and enough practical skill to follow torque settings, leveling guidance, and charging setup instructions. In my experience, the strongest candidates are not first-time tool users but homeowners comfortable with anchoring brackets, checking battery charging contacts, and testing seat swivels, footrest sensors, and limit switches. The worst candidates are households trying to solve a complex accessibility problem under time pressure without confirming the user’s weight, transfer ability, and safety needs.
Budget options generally fall into four categories: new self-install straight-lift kits, factory-refurbished units, used complete systems from resale specialists, and used local-market units sold as-is. New kits usually offer the cleanest manuals and better parts availability. Refurbished lifts often hit the sweet spot on value if the seller replaces wear items and provides support. Used specialist dealers can be excellent when they inspect batteries, gears, and rails. Marketplace finds are the cheapest, but they carry the highest risk because missing brackets, dead batteries, obsolete remotes, or mismatched rail lengths can erase the savings quickly.
How to compare budget stair lift options without missing hidden costs
The smartest comparison framework is not brand first; it is staircase fit, user fit, installation scope, and support. Start with staircase measurements: total run, number of treads, width, top and bottom clearance, and whether door swings or radiators interfere with the seat or footrest. Then match the user: weight capacity, seat height, swivel style, arm width, and whether a perch seat or folding rail is needed. Finally, compare what the kit actually includes. Some “budget stair lift installation” offers look inexpensive until you discover the rail is extra, remote controls are optional, the power supply is not included, or the listed price assumes collection rather than delivery.
Ask direct questions that produce usable answers. Is the rail cut to length before shipping? Are mounting points stair-mounted or wall-mounted? Does the carriage come factory-tensioned? Are batteries included and new? What is the rated duty cycle? Is there a keyed lock, overspeed governor, seatbelt, obstruction sensors on the footrest and carriage, and manual lowering method? If a listing does not answer those points clearly, treat it as incomplete rather than cheap.
| Option | Typical upfront cost | Best use case | Main advantages | Main risks |
|---|---|---|---|---|
| New DIY straight kit | Lowest among new units | Standard straight stairs, capable homeowner | Warranty, current parts, predictable fit | Limited phone support, self-install errors |
| Factory refurbished | Mid-range | Buyers wanting value with inspection | Lower cost than new, tested components | Shorter warranty, cosmetic wear |
| Used from specialist reseller | Low to mid-range | Budget buyers needing guidance | Possible setup help, parts knowledge | Variable stock, older models |
| Private used sale | Lowest cash price | Experienced buyer sourcing parts independently | Very cheap purchase price | No warranty, unknown condition, missing hardware |
Hidden costs usually come from labor and remedial work. If the rail arrives too long and you cannot cut it accurately, you may need a technician. If the batteries are weak, replacement costs add up. If the staircase width is tight, you may need a folding hinge rail or a narrow seat, which changes the comparison entirely. Always price in delivery, disposal of old equipment, possible electrician time, and future service. A budget stair lift is only truly budget-friendly when the all-in cost stays low after installation and the first year of ownership.
Key safety, compliance, and fit factors that matter more than sticker price
Any stair lift comparison that ignores safety is incomplete. Reputable stair lifts typically include a seatbelt, obstruction sensors, final limit switches, battery backup, and a braking system that prevents uncontrolled travel. Buyers should look for products aligned with recognized lift safety standards and sold by companies that can explain testing, load ratings, and maintenance requirements clearly. The exact regulatory path varies by market, but the practical buyer test is simple: can the seller provide documentation, parts diagrams, and installation instructions detailed enough to verify safe use?
Weight capacity is critical. Many budget straight lifts are rated around 250 to 300 pounds, while heavy-duty models go higher but cost more and may need wider stairs. Buying a low-priced model that underserves the user is not savings; it is a failed purchase. Stair width matters too. Many manufacturers recommend about 28 to 30 inches or more for a standard seated lift, though some compact designs work in tighter spaces. If others still need to walk the stairs, measure folded width and footrest projection, not just the staircase itself.
Power setup is often misunderstood. Most modern stair lifts are battery powered and charge at points on the rail, which means they can still run during a power outage for several trips if the batteries are healthy. That is far safer than relying on a non-battery system. However, the charger still needs a suitable outlet, and charging contacts must align precisely. I have seen budget installs fail not because the motor was bad, but because the carriage never charged correctly after a slightly misaligned rail joint.
Fit includes transfer safety. A user with reduced trunk strength may need a powered swivel seat, a higher seat base, or easier-to-operate armrests. Someone with limited knee flexion may need a perch model instead of a standard seat. Budget shopping works only when the product matches the physical needs of the rider. If you are unsure, ask an occupational therapist or mobility dealer to review the setup before purchase. One hour of expert advice is cheaper than replacing the wrong lift.
Best budget-friendly paths: new kits, refurbished systems, rentals, and local deals
For most households, the best budget-friendly path is a refurbished straight stair lift from an established mobility dealer or specialist reseller. This route often balances cost, reliability, and support better than a random used purchase. A good refurbisher will test the motor, gearbox, carriage rollers, charging system, seat switch, remotes, and safety edges, then replace worn batteries and visibly damaged trim. You may get a shorter warranty than on a new unit, but you gain a verified parts source and someone to call if the unit faults after installation.
New DIY kits make sense when the staircase is simple and the seller is transparent. Several value-oriented brands and private-label distributors offer straight lifts in modular formats that reduce shipping and setup complexity. These kits can be good purchases if they include clear manuals, prewired controls, and phone support with actual technicians rather than generic customer service. When I compare these offers, I prioritize rail quality, battery brand, and response time for spare parts over cosmetic features like upholstery color or arm shape.
Rentals deserve more attention in a budget stair lift guide, especially for temporary recovery after surgery or injury. A rental can be the cheapest option when the need will last only a few months. Many straight lifts can be rented with modest upfront fees, though the economics vary by region. The caution is that not all companies offer self-installation on rentals, and long rental periods may exceed the cost of buying refurbished. If the need could become permanent, calculate six, twelve, and eighteen month totals before deciding.
Local marketplace deals can work, but only under strict conditions. Verify model numbers, rail length, charger type, and whether all brackets, rack sections, remotes, keys, and manuals are included. Ask for a video showing powered travel up and down the rail, seat swivel function, footrest fold, and charging at both ends if applicable. If the seller says “worked when removed,” assume you may be buying a parts donor unless demonstrated otherwise. The lowest listing price is rarely the best value unless you already know how to inspect the unit thoroughly.
Installation realities, maintenance needs, and the smartest hub-style buying strategy
DIY stair lift installation is usually easier than people expect mechanically and harder than they expect operationally. Mounting brackets to stair treads and joining rail sections are straightforward if the instructions are accurate. The more demanding part is positioning the rail for safe boarding, confirming the carriage rides smoothly, setting charge points, and testing every safety circuit before first use. Most lifts are heavy enough that at least two adults are needed, and a mistake on a staircase creates obvious injury risk. If the manufacturer offers paid remote support, video guidance, or a hybrid install check, that can be money well spent.
Maintenance is another area where buyers underestimate cost. Batteries commonly need replacement every few years depending on use and charging quality. Rails need cleaning, seat pivots and footrests need periodic inspection, and fault codes should not be ignored. A noisy gearbox, rough start, or failure to charge consistently is not a nuisance; it is an early warning. Budget buyers should favor models with available service manuals, common battery sizes, and established dealer networks. A cheap lift becomes expensive when a proprietary board fails and no one stocks it.
As the central guide within budget-friendly options, this article should help you sort your next steps. If you are evaluating a straight staircase, compare new DIY kits against refurbished systems first. If you need temporary access, run the numbers on rentals. If you are considering a used local purchase, inspect it like a technician, not like a bargain hunter. Focus on fit, safety features, battery health, rail compatibility, and after-sale support before price alone. The main benefit of a smart budget stair lift purchase is not merely saving money today; it is gaining safe, reliable access to the full home without paying twice for a bad decision. Use this guide to narrow the field, then move on to model-specific reviews, measurement checklists, and installation support articles before you buy.
Frequently Asked Questions
1. Are DIY stair lift kits really the cheapest option for a budget installation?
Not always. A DIY stair lift kit can reduce upfront labor costs, but the lowest advertised price does not automatically mean the best overall value. When comparing budget stair lift installation options, it is important to look beyond the base kit price and include the full cost of ownership. That means reviewing what is included with the rail, seat, power supply, controls, and mounting hardware, as well as whether delivery, setup support, warranty coverage, and replacement parts are part of the package.
Many lower-cost kits are attractive because they use preconfigured rails, modular sections, or simplified installation methods. Those features can make a basic straight staircase more affordable to equip than a fully custom system. However, savings can disappear quickly if the kit requires extra brackets, electrical upgrades, landing modifications, or paid technical support after purchase. In some cases, a homeowner may also need to hire a handyman or electrician to complete part of the work, which changes the true cost comparison.
The most affordable option is usually the one that balances purchase price with safety, reliability, and serviceability. A slightly more expensive kit with better instructions, stronger warranty terms, easier parts availability, and more dependable customer support can be cheaper over time than an ultra-low-cost model that is difficult to fit correctly or expensive to repair. For buyers on a tight budget, the smart approach is to compare total installed cost, expected maintenance, and long-term support rather than focusing only on the sticker price.
2. What should I compare when evaluating different DIY stair lift kits?
The best comparison starts with staircase compatibility. Not every kit fits every staircase, and this is one of the most important budget issues because buying the wrong system can create return costs, delays, or expensive modifications. Check whether the lift is designed for a straight staircase only or whether it can handle turns, intermediate landings, narrow stair widths, or unusual floor-to-floor measurements. Most budget-friendly DIY kits are intended for straight stairs, and homeowners should confirm precise dimensions before ordering.
Next, compare weight capacity, seat size, folded width, swivel features, remote controls, battery backup, charging method, and rail design. These details affect both usability and long-term satisfaction. A low-cost unit that technically fits the staircase but is uncomfortable, too narrow, or difficult to use safely may not be a good value. Also look closely at what “DIY” really means for each brand. Some kits are true homeowner-install systems with step-by-step guides and modular rails, while others are better described as partial DIY products that still require professional alignment, testing, or electrical work.
Warranty and service support should also be compared carefully. Look at coverage for the motor, gearbox, batteries, electronics, and rail components. Some budget kits have limited warranties that cover parts only, while others may exclude wear items or require the owner to handle diagnosis and shipping. It is also wise to ask how quickly replacement parts can be supplied and whether phone or video installation support is available. Finally, compare the likely maintenance burden. A kit that is easy to adjust, clean, charge, and troubleshoot will generally be more economical over the long term than one that saves a little money upfront but becomes a service headache later.
3. Is it safe to install a stair lift kit yourself?
It can be safe in the right circumstances, but only if the kit is specifically designed for homeowner or low-complexity installation and the instructions are followed exactly. Stair lifts are mobility devices, not simple convenience products, so safe installation matters as much as the quality of the lift itself. A proper installation includes secure rail mounting, correct seat alignment, accurate charging contact placement, safe start and stop operation, and full testing of obstruction sensors, seat locks, footrest switches, and emergency features.
DIY installation is usually most realistic on a straightforward, straight staircase where the manufacturer provides clear measuring instructions, predrilled or modular rail sections, mounting templates, and responsive technical support. Even then, the installer needs confidence with tools, careful attention to detail, and the ability to verify that the system operates smoothly over the full travel distance. If any part of the staircase is uneven, unusually narrow, damaged, or structurally questionable, a “budget” DIY approach can become risky and may not be the right choice.
One more practical safety issue is user need. If the stair lift is being installed for someone with significant balance, transfer, or mobility limitations, there is less room for installation mistakes. In those situations, paying for professional setup or at least professional inspection may be the safer value decision. A DIY kit is only truly budget-friendly if it performs reliably and safely from day one. The lowest-cost path is not worth it if it leads to poor fit, unreliable travel, or preventable fall risk.
4. Which hidden costs can make a budget DIY stair lift more expensive later?
The most common hidden costs come from incomplete pricing. Some stair lift kits are marketed with an attractive entry price but leave out items that are essential for real-world use, such as additional rail sections, overruns, call/send remotes, upgraded seats, extra mounting hardware, or delivery charges. Batteries are another area to check. If the unit uses battery backup, ask whether the batteries are included, what their expected lifespan is, and how expensive replacements will be.
Installation-related extras can also add up. Even with a DIY kit, a homeowner may need help with measurements, lifting the rail into position, securing brackets, adjusting the seat, or providing a nearby power outlet. If the staircase or surrounding wall requires repair or modification, those costs can quickly erase any apparent savings. Return policies matter too. A stair lift that is ordered with incorrect measurements or found to be incompatible may involve significant restocking, return freight, or custom-part fees.
Long-term service is where some bargain kits become unexpectedly expensive. If replacement parts are hard to source, shipped slowly, or sold only through limited channels, downtime and repair costs rise. Weak warranty terms can also shift repair expense to the owner much earlier than expected. Before buying, ask about annual maintenance recommendations, battery replacement schedules, track cleaning requirements, and the availability of technical support after installation. A truly affordable stair lift kit is one that keeps operating costs predictable, not one that simply starts with the lowest advertised number.
5. Who is the best candidate for a DIY stair lift kit, and when is professional installation the better value?
A DIY stair lift kit is usually the best fit for a homeowner with a simple straight staircase, solid measuring accuracy, and enough practical skill to follow technical instructions carefully. It can also work well when the buyer wants to reduce labor costs but still choose a product from a reputable manufacturer that offers strong support, modular components, and a clear installation process. In this situation, budget-friendly does not mean cutting corners; it means selecting a lift that is designed to be installed efficiently without sacrificing essential safety features or future service access.
Professional installation is often the better value when the staircase is curved, split by a landing, unusually narrow, steep, or structurally inconsistent. It is also the stronger choice when the user has advanced mobility needs or when the household cannot tolerate trial-and-error delays. Professional installers can spot fit problems early, make fine adjustments, test the system thoroughly, and often provide more seamless warranty support. In many cases, they also reduce the risk of ordering mistakes, which is a major source of wasted money in budget stair lift purchases.
The key is to match the installation method to the complexity of the home and the needs of the rider. If the staircase is straightforward and the kit is well-supported, DIY may offer meaningful savings. If there is any doubt about fit, safety, or long-term reliability, paying more upfront for professional installation can be the more economical decision overall. The best budget stair lift is not necessarily the one with the lowest initial cost, but the one that delivers safe operation, dependable service, and fewer expensive surprises over time.