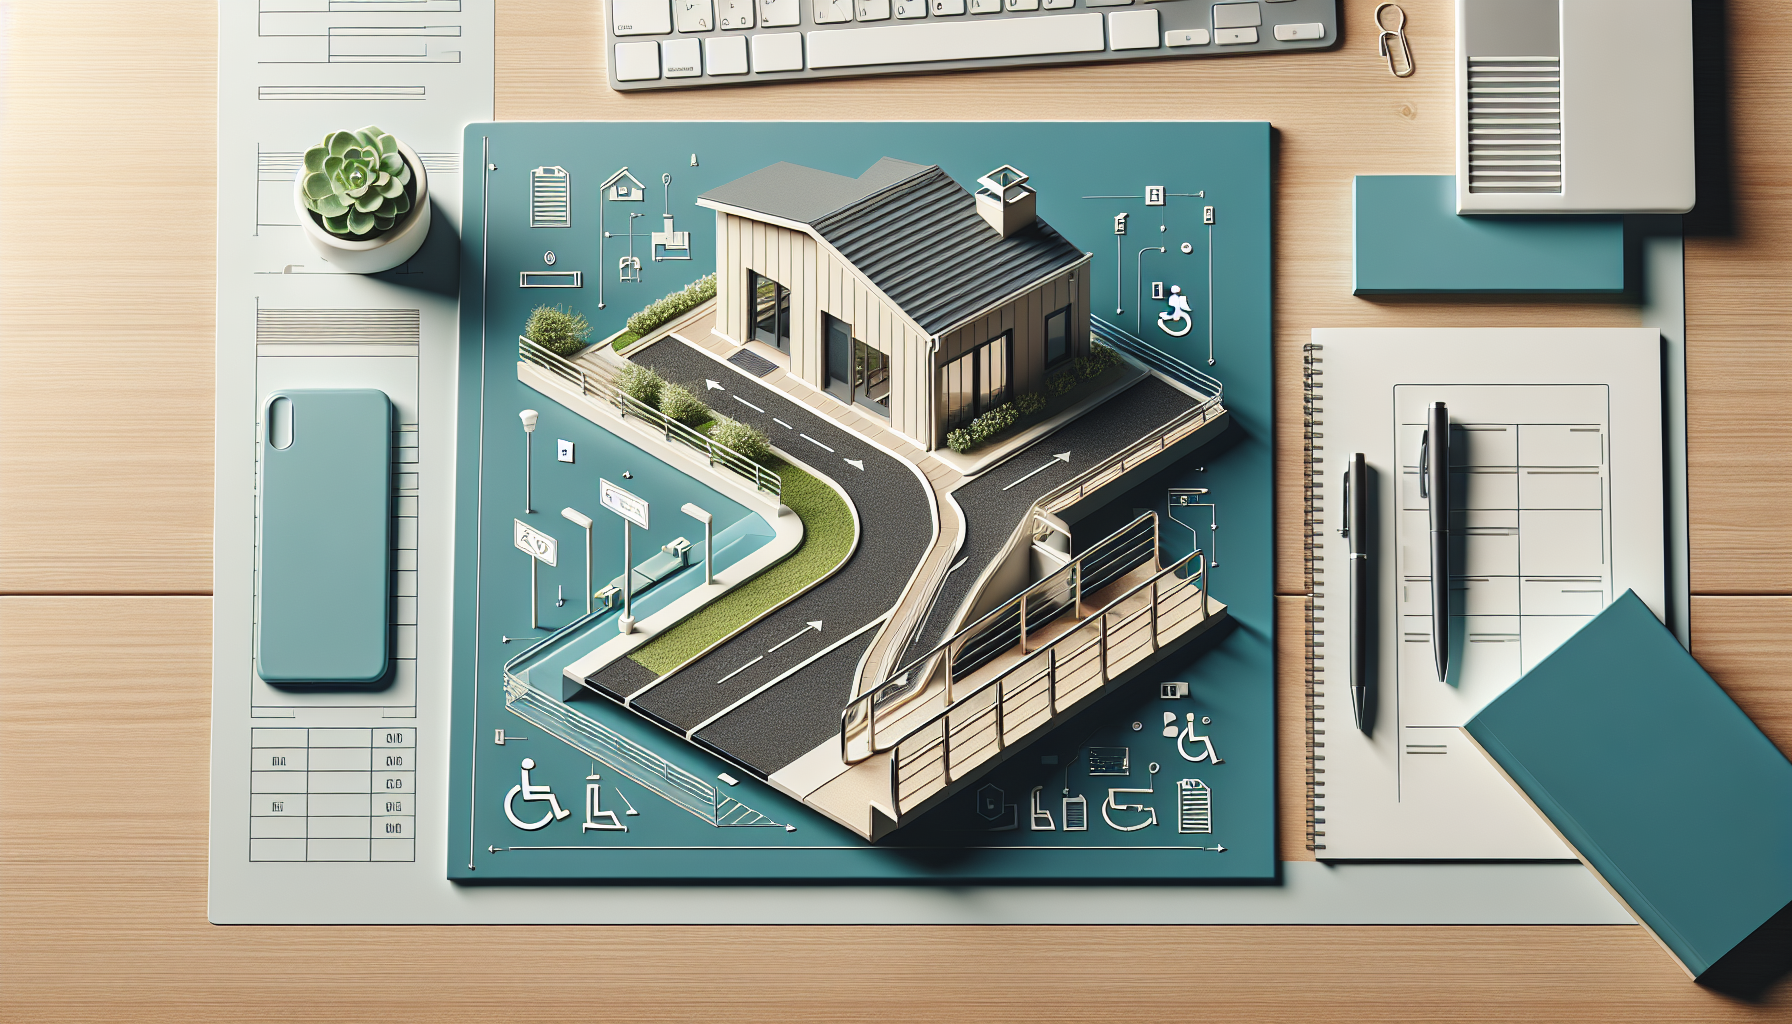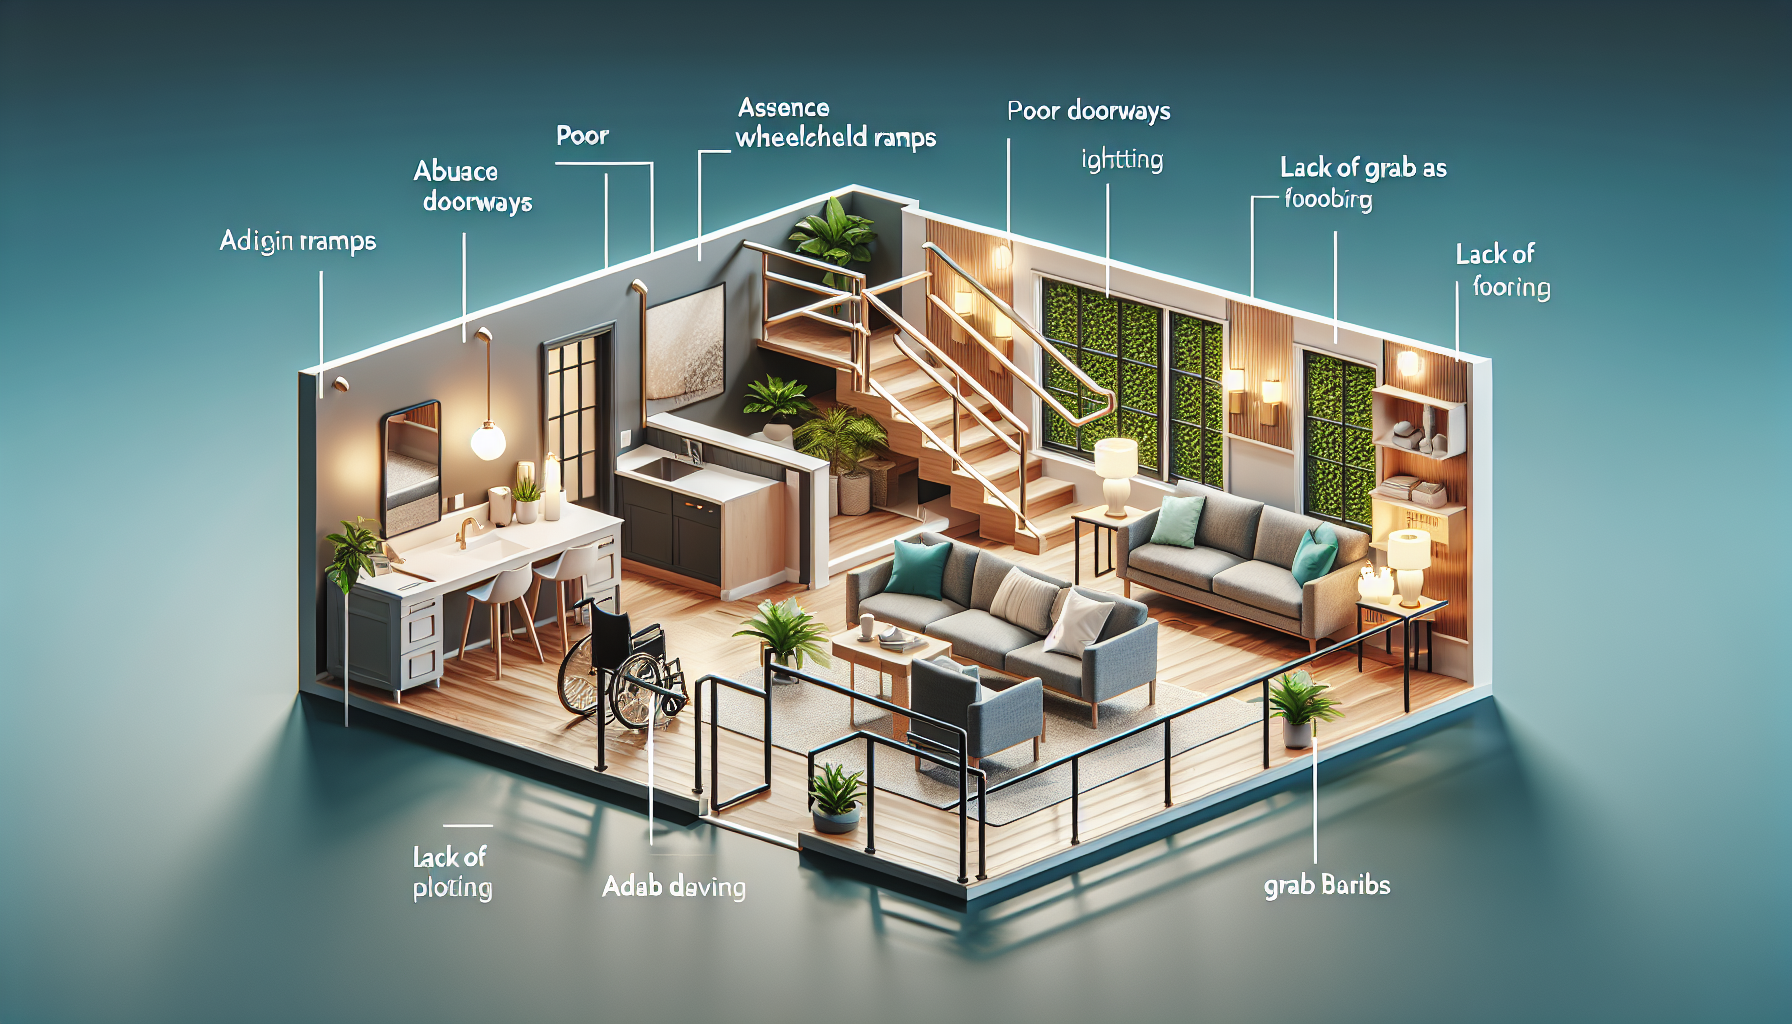
The 5 most common ADA mistakes in home design show up long before a homeowner notices them in daily use. They begin at the planning stage, when room dimensions, fixture placement, door swings, flooring choices, and lighting decisions are treated as style questions instead of accessibility requirements. In residential projects, the ADA is often discussed loosely, even though the law applies differently to private homes, multifamily housing, public accommodations, and federally funded properties. For homeowners and designers, the practical goal is usually not strict legal ADA compliance in a single-family residence, but designing to recognized accessibility guidelines that improve safety, mobility, and long-term usability. That distinction matters because the standards are technical, measurable, and often misunderstood. I have seen expensive remodels fail simple mobility tests because a hallway was narrowed by trim, a beautiful curbless shower lacked usable controls, or a kitchen island turned a wheelchair turning radius into a dead end. Good accessible design is not guesswork. It relies on clear dimensions, reach ranges, maneuvering clearances, stable surfaces, and predictable layouts. This article explains the five mistakes that most often undermine accessible home design, why they happen, and how to avoid them using established guidance from the ADA Standards for Accessible Design, ANSI A117.1, Fair Housing accessibility requirements, and universal design best practices.
1. Insufficient clear floor space and turning room
The most common accessibility failure in home design is simply not leaving enough room for a person to move, approach, turn, and transfer. On paper, a bathroom or kitchen can meet a homeowner’s wish list and still be functionally unusable for a wheelchair user, someone using a walker, or a caregiver assisting another person. Designers often focus on fixture sizes but forget the clear floor space around them. In practice, access depends on maneuvering area. A wheelchair typically needs a turning space of about 60 inches in diameter or a T-shaped turning area. Door swings, vanity corners, toilet clearances, island overhangs, and protruding cabinetry regularly steal that space.
I see this most often in bathroom remodels. A homeowner wants a larger vanity, linen tower, and frameless shower, and the room technically fits all three. Once installed, the bathroom becomes difficult to navigate because the toilet is boxed in, the door conflicts with the front approach to the sink, and the shower entry narrows the available turning radius. Kitchens fail in similar ways. Aisles that feel comfortable for an ambulatory user become restrictive when a chair must pivot or when a walker needs side clearance. In small homes, designers sometimes assume that one accessible feature compensates for an inaccessible layout. It does not. A roll-in shower is of limited value if the user cannot position next to the sink or pass through the bathroom without backing up repeatedly.
The fix is to dimension mobility space first and build around it. Start every room with clear floor space diagrams, not product catalogs. Verify approach zones at appliances, sinks, toilets, and showers. Account for door hardware and open-door positions. Use scaled plans and, ideally, real tape-on-floor mockups before construction. This is one of the strongest internal linking opportunities in an accessibility hub because room-by-room planning guides for bathrooms, kitchens, hallways, and entries naturally support the topic and help readers evaluate each space with measurable criteria.
2. Doors, hallways, and thresholds that block access
The second major mistake is treating circulation elements as secondary details. In reality, accessible home design succeeds or fails at the doorway. A beautifully planned room is irrelevant if a wheelchair cannot pass through the opening, if a walker catches on a threshold, or if the user cannot reach and operate the handle while maneuvering. In many homes, the nominal door size sounds adequate, but the actual clear opening is too tight once the slab, hinges, stop, and hardware are considered. Hallways may also comply on paper yet pinch at trim returns, furniture, or poorly placed light switches.
Thresholds are a frequent hazard. Even a small height change can stop wheels, destabilize a cane user, or create a trip point for someone with limited foot clearance. I have seen front entries marketed as accessible because they had a ramp outside, while the interior saddle and weather strip still created a functional barrier. Pocket doors can help in tight bathrooms, but only if the pull hardware and wall cavity allow practical operation. Lever handles are generally better than round knobs because they require less grip strength and fine motor control. Closers should also be considered carefully. A heavy self-closing door may satisfy security goals and still be almost impossible for an older adult to manage.
| Element | Common mistake | Better practice | Why it matters |
|---|---|---|---|
| Door opening | Specified by slab width only | Verify actual clear opening with hardware and swing | Mobility devices need usable clearance, not nominal size |
| Hallway width | Measured wall to wall before trim and obstructions | Measure finished width at the narrowest point | Small reductions can block turning or passing |
| Threshold | Raised saddle or abrupt floor transition | Low, beveled transition with flush alignment where possible | Reduces trip risk and improves wheeled access |
| Door hardware | Round knobs and tight grasp requirements | Lever hardware with manageable operating force | Supports users with limited strength or dexterity |
When evaluating circulation, think beyond minimum numbers. Consider approach direction, hand dominance, carry items, and emergency use. A narrow laundry room may be passable in ideal conditions but impossible when a door is open and a basket is in hand. Good accessible design makes movement intuitive and low-effort across the whole home, not just at one featured entry.
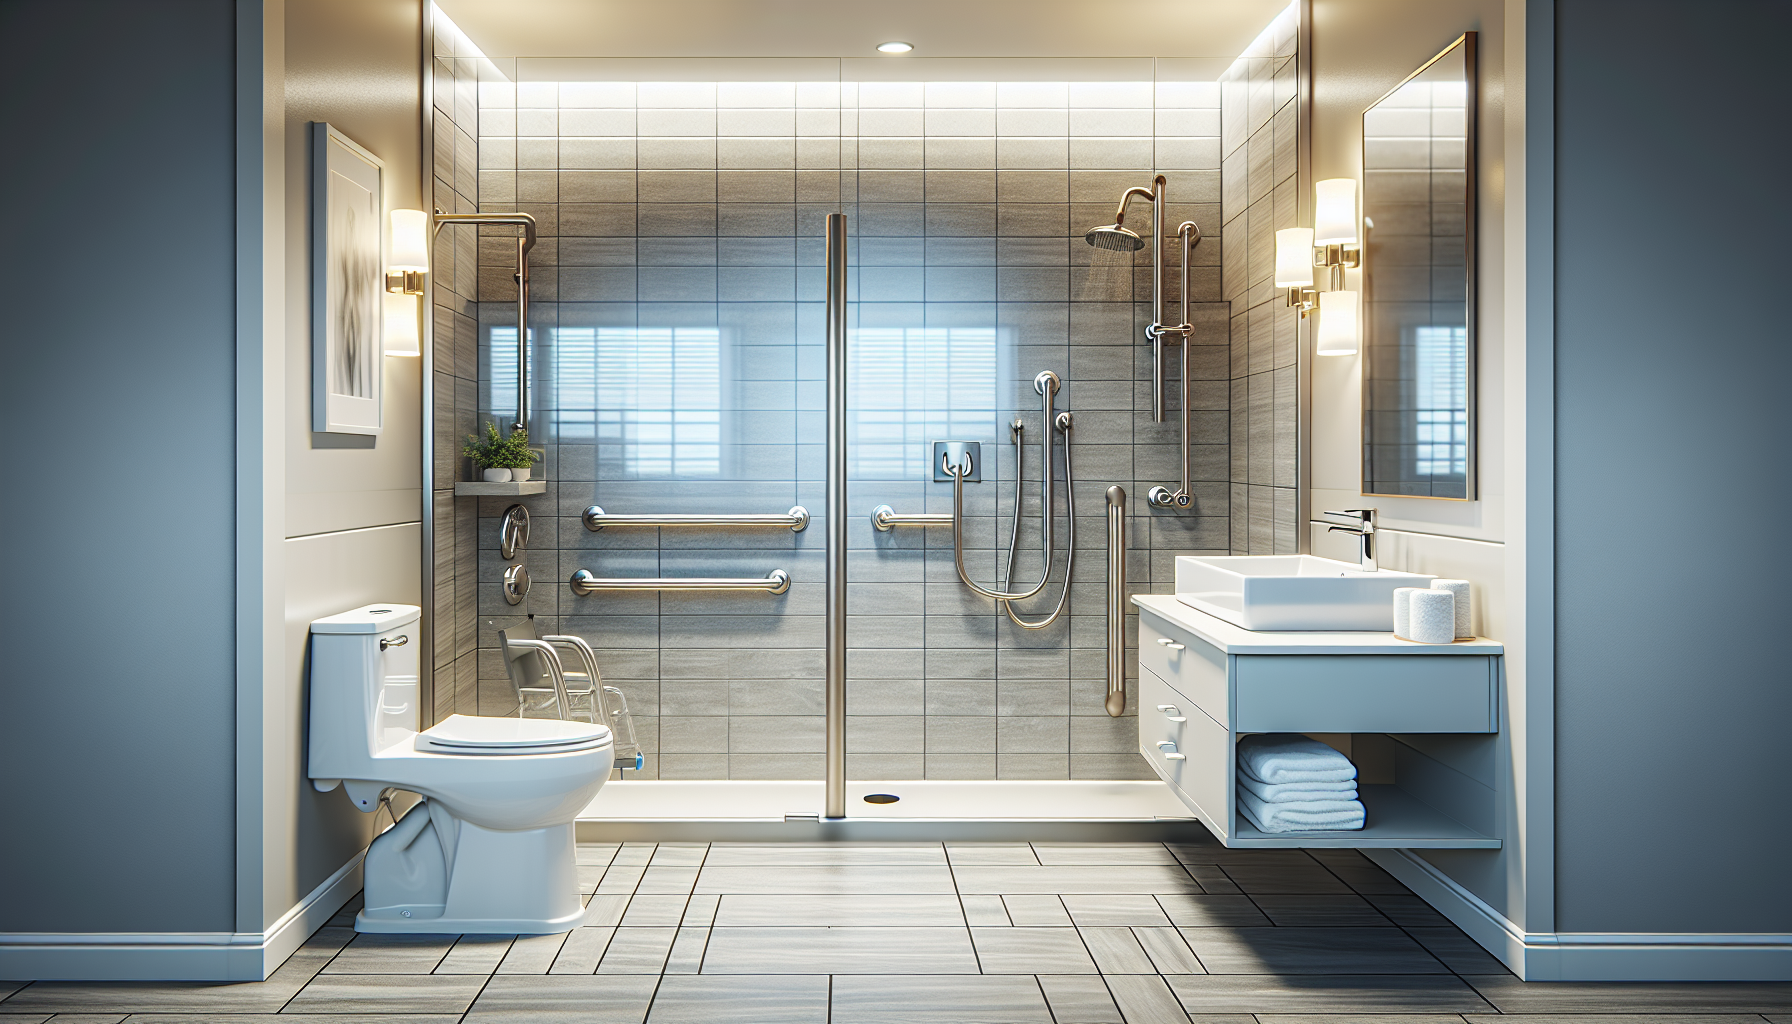
3. Bathrooms that look accessible but do not function safely
Bathrooms are where superficial accessibility decisions cause the greatest real-world harm. The most common mistake is assuming that one visible feature, such as a grab bar or curbless shower, makes the room accessible. In practice, bathroom usability depends on a coordinated set of details: toilet location, transfer space, shower dimensions, control placement, slip resistance, drainage slope, sink knee clearance, mirror height, and reach range for accessories. If these elements are not planned together, the result may satisfy a visual checklist while failing the user.
Curbless showers are a perfect example. They are widely recommended, and for good reason, but they are not automatically safe or accessible. If the shower is too small, the bather may have nowhere to position a chair or caregiver. If the hand shower and controls are mounted beyond seated reach, independent use is lost. If the floor slope extends too far into the bathroom, water migration creates a slip hazard. If there is no blocking in the wall, future grab bar placement becomes limited and expensive. Likewise, toilets are often centered for symmetry instead of transfer access. A few inches in the wrong direction can make side transfer difficult or impossible.
Vanities also create problems. Decorative sink bases rarely provide the knee and toe clearance needed for seated use, and exposed pipes can cause burns or impact injuries unless insulated or protected. Mirrors mounted for standing users only, towel bars placed behind the user, and storage located above shoulder height all reduce functional access. Better bathroom design begins with use scenarios. Can a person enter, close the door, approach the toilet, transfer safely, reach toilet paper, wash hands, and exit without awkward repositioning? Can they shower seated, control water before entering the spray, and stabilize themselves during transfer? Those are the practical tests that matter. For this hub page, bathroom planning should connect naturally to detailed cluster articles on roll-in showers, grab bars, accessible vanities, and aging-in-place bathroom layouts.
4. Kitchens with inaccessible work zones and reach ranges
Kitchens are often the most expensive room to remodel and one of the least forgiving when accessibility is overlooked. The fourth common mistake is designing around appliance aesthetics and storage volume while ignoring how a person will actually prepare food, clean up, and retrieve items. Accessibility in kitchens is not just about aisle width. It includes counter heights, knee space, appliance door interference, control locations, landing areas, storage reach, task lighting, and flooring traction. A kitchen can look open and still force unsafe stretching, awkward side reaches over hot surfaces, and repeated backward movement.
One of the biggest failures is poor appliance selection and placement. A wall oven mounted too high becomes dangerous for seated users and challenging for many standing users with balance limitations. A refrigerator with hard-to-reach drawers, a dishwasher door that blocks the sink approach, or a microwave placed above a range all create predictable hazards. Cooktops require special care because front controls are generally safer than rear controls, reducing the need to reach over heat. Sinks need usable approach space, but homeowners often fill the base cabinet completely, eliminating knee clearance that could support seated tasks such as washing produce or loading dishes.
Storage strategy matters as much as circulation. Standard upper cabinets place daily items outside the comfortable reach range for many users. Deep base cabinets force bending and blind retrieval. Better solutions include pull-out shelves, full-extension drawers, appliance lifts, lazy Susans in corners, and drawer-style microwave or refrigeration options where budget allows. Lighting is equally important. I have worked in kitchens where glare on polished counters made edge detection harder for low-vision users, while under-cabinet lighting dramatically improved safety without major construction changes.
The practical rule is to design for task completion, not just room appearance. Ask whether a user can take food from storage, wash it, prepare it, cook it, plate it, and clean up with minimal strain and without dangerous reaches. If not, the kitchen is not truly accessible. This section also supports related content on accessible cabinet hardware, appliance specifications, and universal kitchen design layouts.
5. Ignoring lighting, controls, flooring, and future adaptability
The fifth mistake is less obvious than a narrow doorway, but it affects daily independence just as much: failing to design the small environmental details that make a home usable over time. Lighting, switches, outlets, thermostats, smart controls, flooring transitions, acoustic conditions, and reinforcement for future modifications are often value-engineered late in the project. That is a mistake. Accessibility is cumulative. A home becomes safer and easier to use when many small elements work together predictably.
Lighting should support wayfinding, depth perception, and task visibility. Relying on one overhead fixture per room creates shadows, glare, and low contrast at counters, stairs, and bathroom mirrors. Layered lighting with even ambient light, task lighting, and night lighting improves usability for older adults and people with low vision. Controls should be reachable and consistent. Light switches hidden behind doors, outlets placed too low for easy access, and thermostats mounted too high all create unnecessary friction. Rocker switches, illuminated controls, and voice or app integration can be valuable, but they should complement, not replace, physical controls that work during power or network issues.
Flooring deserves closer attention than it usually receives. Thick plush carpet increases rolling resistance and can catch mobility aids. Highly polished stone may look luxurious while becoming slick when wet. Uneven transitions between rooms create both trip hazards and wheelchair barriers. Better choices are firm, stable, slip-resistant surfaces with low transitions and matte finishes that reduce glare. Future adaptability is the final overlooked issue. Even when a homeowner does not need full accessibility today, blocking for grab bars, stacked closets for future lifts, reinforced stair walls for rail systems, and bathroom layouts that can later accept a seated shower are inexpensive during construction and costly after the fact.
This is where accessible home design delivers its broadest benefit. It supports aging in place, temporary injury recovery, multigenerational living, and better resale appeal in a market where more buyers are seeking step-free entries and first-floor living options. The smartest projects treat accessibility as durable infrastructure rather than a medical add-on.
The five most common ADA mistakes in home design are preventable because they follow predictable patterns. Rooms are planned around fixtures instead of people, circulation is treated as leftover space, bathrooms prioritize appearance over transfer and reach, kitchens ignore task flow, and finishing details are chosen without considering mobility, vision, strength, or future change. The solution is not to guess at accessibility or to rely on a few visible products. It is to use measurable standards, realistic use scenarios, and room-by-room planning that starts with clearances and ends with safe operation.
For homeowners, builders, and designers, the biggest benefit of getting this right is not simply avoiding a bad remodel. It is creating a home that remains comfortable, usable, and safer across decades of changing needs. Whether you are updating one bathroom or planning a whole-house renovation, use this hub as your starting point for ADA compliance and accessibility guidelines, then move into deeper resources on entries, kitchens, bathrooms, flooring, lighting, and mobility-friendly layouts. Review your plans against actual dimensions, ask product-specific questions early, and bring accessibility into the project before framing begins. That is when the best outcomes are easiest to achieve.
Frequently Asked Questions
What are the most common ADA-related mistakes people make when designing a home?
The most common ADA-related mistakes in home design usually happen early, when accessibility is treated as an optional feature instead of a core planning standard. In practice, the biggest problems tend to involve inadequate clear floor space, doorways and hallways that are too narrow, poor bathroom layouts, badly placed fixtures and controls, and finish selections that create mobility or safety issues. For example, a bathroom may look beautiful on paper but fail in daily use because there is not enough turning radius for a wheelchair, the toilet is positioned too close to a wall, or the vanity blocks needed approach space. Similarly, a front entry may include one small step, a raised threshold, or a tight door swing that seems harmless until someone using a walker, wheelchair, or cane tries to navigate it.
Another major mistake is assuming accessibility can be added later without significant redesign. Many homeowners believe they can retrofit grab bars, widen a doorway, or swap out flooring after construction, but those changes often become expensive because framing, plumbing, electrical locations, and cabinetry were not planned with accessibility in mind. Lighting is also commonly overlooked. Poorly lit circulation paths, glare-heavy finishes, and switches placed too high or too far from the entry reduce usability for people with mobility, vision, or dexterity limitations. In short, the most common mistakes are not just about obvious barriers; they are about failing to coordinate layout, dimensions, hardware, finishes, and circulation as part of one accessible design strategy.
Does the ADA actually apply to private homes, or is that a misunderstanding?
This is one of the most important questions in residential design because the term “ADA compliant” is often used too broadly. In general, the Americans with Disabilities Act does not apply to private single-family homes in the same way it applies to public accommodations, commercial spaces, government facilities, or certain multifamily and federally funded housing settings. That means a privately owned house is usually not legally required to meet ADA standards in the same way a restaurant, hotel, medical office, or retail store would be. However, that does not make accessibility irrelevant. Other laws, codes, funding requirements, fair housing rules, local amendments, or universal design goals may still shape what should be built.
The misunderstanding happens when homeowners, builders, and even some designers use “ADA” as shorthand for any accessible feature. While that language is common, it can create confusion about what is legally required versus what is strongly recommended for safety, aging in place, resale value, or inclusive living. For example, a private residence may not be subject to ADA standards, but if the project involves a multifamily development, a common-use area, a rental setting, or public-facing components, different regulations may come into play. The best approach is to stop treating “ADA” as a casual design label and instead determine which standards actually apply to the project. Once that legal framework is clear, the design team can make informed choices that support accessibility, usability, and long-term function without relying on assumptions.
Why are bathrooms and kitchens so often the source of accessibility problems?
Bathrooms and kitchens are the most technically demanding spaces in a home, which is why they are often where accessibility mistakes become most obvious. These rooms combine tight layouts, fixed plumbing locations, appliance clearances, cabinetry, door swings, and multiple user movements within a limited footprint. A bathroom may fail functionally if there is not enough space beside the toilet for transfer, if the shower entry has a curb that creates a trip hazard, or if the sink design prevents knee clearance for a seated user. Even the location of towel bars, mirrors, faucets, and toilet paper holders can undermine accessibility when they are placed for visual symmetry rather than actual reach and use.
Kitchens present similar challenges because they require frequent turning, reaching, lifting, and side approaches. Common mistakes include islands that reduce maneuvering space, appliances with doors that block circulation when open, upper cabinets that are difficult to access, and countertops set at heights that do not work for all users. Flooring choices matter here too. A polished surface may photograph well but become slippery under typical kitchen conditions. Lighting is equally critical; shadows at work surfaces, glare on counters, and poor task lighting can make food preparation harder and less safe. These rooms demand more than good aesthetics. They require precise dimensional planning and a realistic understanding of how people move, reach, pivot, sit, stand, and transfer during everyday routines.
Can accessibility problems be fixed after the home is built, or do they need to be addressed during planning?
Some accessibility problems can be corrected later, but the cost, complexity, and limitations of retrofitting are exactly why these issues should be addressed during planning whenever possible. It is much easier to design wider circulation paths, better door locations, lower thresholds, reinforced walls for future grab bars, and appropriate fixture placement before framing, plumbing, and electrical systems are installed. Once a home is completed, even simple modifications can trigger larger changes. Widening a doorway may affect adjacent walls, trim, electrical switches, and flooring transitions. Reworking a bathroom for better clearance may require moving plumbing lines, replacing cabinetry, and changing tile layouts. What seems like a small accessibility adjustment often becomes a multi-trade renovation.
That said, not every issue requires a full rebuild. In some homes, improvements such as lever hardware, better lighting, lower controls, slip-resistant flooring, handheld shower fixtures, and strategically placed supports can make a meaningful difference. The key is understanding which barriers are cosmetic and which are structural. If a home’s basic layout does not allow for proper circulation, transfer space, or accessible entry, cosmetic upgrades will not solve the underlying problem. Planning ahead provides the greatest flexibility, protects the budget, and allows accessibility to feel integrated rather than added on. The best results come when accessibility is treated as a design priority from the beginning, not as a correction after inconvenience or injury reveals what was missed.
What should homeowners ask a designer or contractor to avoid common accessibility and ADA-related mistakes?
Homeowners should start by asking a very direct question: which accessibility standards, codes, or guidelines apply to this specific project, and why? That question helps distinguish legal requirements from best practices and prevents vague promises about a home being “ADA friendly” without technical backing. From there, homeowners should ask how clear floor space, turning radius, door widths, hallway widths, thresholds, fixture heights, reach ranges, and lighting levels are being handled in the design. They should also ask to see these considerations on the plans, not just hear verbal assurances. Accessibility decisions need to be documented in dimensions and product selections, especially in bathrooms, kitchens, entries, and any first-floor living spaces.
It is also smart to ask how the home will function over time, not just on move-in day. Can someone with limited mobility enter without stairs? Is there enough reinforcement in walls for future grab bars? Are light switches, outlets, and controls placed where they can be reached comfortably? Will flooring remain safe when wet? Do door swings interfere with maneuvering space? These are practical questions that reveal whether a design team is thinking beyond appearance. Homeowners should also ask contractors and designers whether they have experience with accessible residential design and whether they coordinate closely with specialists when needed. The goal is not simply to avoid code trouble. It is to create a home that works safely, comfortably, and predictably for a wider range of users now and in the future.