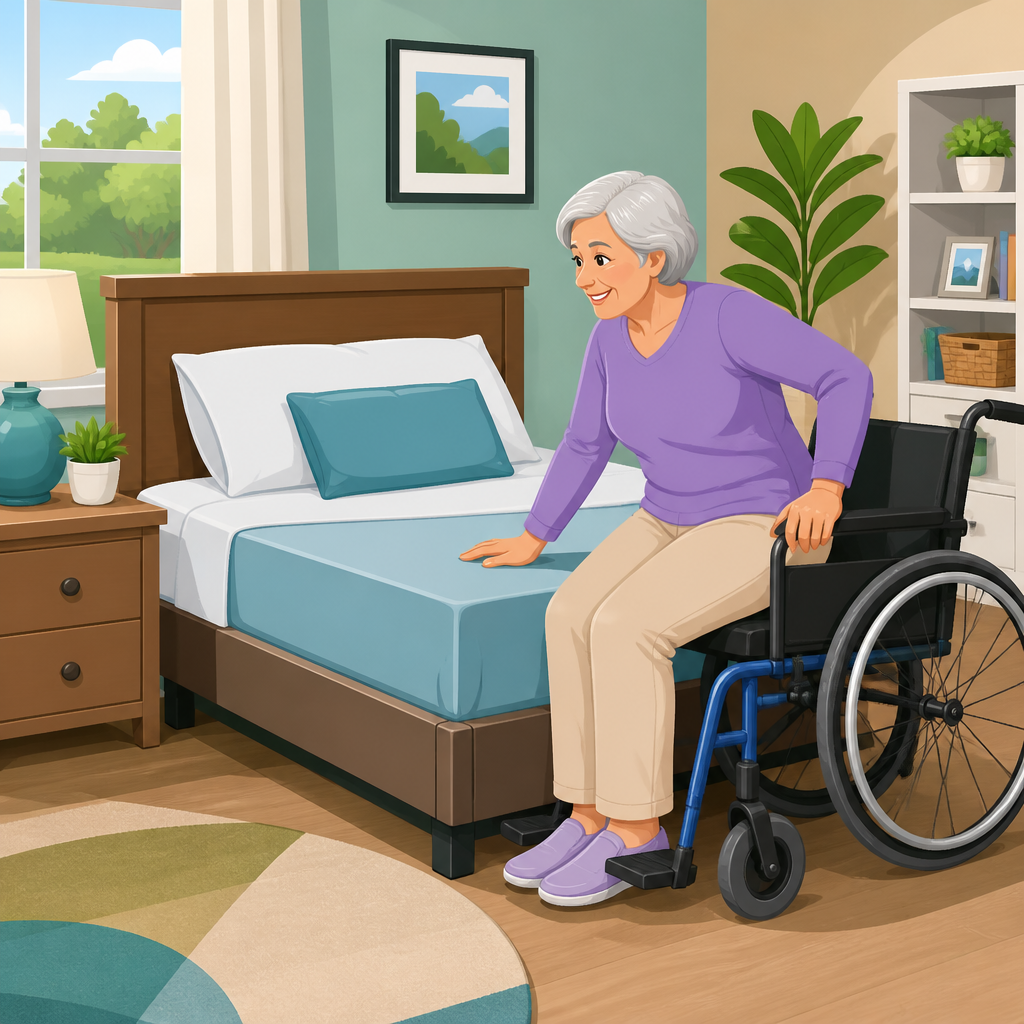
Bed height affects every transfer, and in an accessible bedroom it often determines whether a person can move safely, independently, and with less pain. In rehabilitation work, I have seen the same pattern repeatedly: a bed that is only a few inches too high or too low can turn a manageable sit-to-stand into a risky slide, strain a caregiver’s back, or make nighttime toileting much harder than it needs to be. When people search for the right bed height for easier transfers, they are usually asking a bigger question about bathroom and bedroom accessibility: how should the whole personal-care environment be arranged so movement feels predictable, efficient, and safe?
Bed height refers to the distance from the floor to the top of the compressed mattress surface where the user actually sits, not just the frame height. Transfers are the controlled movements from one surface to another, such as wheelchair to bed, walker to bed, bed to commode, or bed to standing. Accessible bedroom design means organizing furniture, flooring, lighting, assistive equipment, and pathways so a person with limited mobility can move with minimal physical effort and lower fall risk. Bathroom accessibility is inseparable from bedroom setup because the most common overnight route is bed to bathroom and back, often while sleepy, in low light, and under time pressure.
This matters because falls during transfers are common, costly, and often preventable. A safer setup reduces emergency visits, preserves energy, and helps people keep routines that support dignity. The best bedroom is not simply barrier-free; it is tuned to the user’s body mechanics, strength, assistive devices, and habits. An effective hub for bathroom and bedroom accessibility starts with bed height, then connects that decision to transfer technique, support equipment, flooring, clearances, and the bathroom route. When these elements work together, the room becomes easier to use every day, not just during recovery.
How to determine the right bed height for easier transfers
The safest bed height is usually the height that lets the user place both feet flat on the floor with knees and hips close to ninety degrees while sitting on the mattress edge. For many adults, that ends up around 20 to 23 inches from floor to top of the compressed mattress, but there is no universal number. The right target depends on leg length, ankle range, trunk control, transfer method, and whether the person stands, pivots, slides, or uses a mechanical lift. In practice, I measure the user while they wear their usual footwear and sit in the device they transfer from most often, because a shoe sole or wheelchair cushion can change the working height meaningfully.
If the bed is too high, the person may perch on the edge with toes barely touching, which reduces stability and makes standing difficult. If the bed is too low, they may drop too far when sitting and need more leg and arm strength to stand back up. For lateral transfers from wheelchair to bed, matching heights closely is ideal; a slight downhill transfer to the destination surface may help some users, but too much difference increases shear and loss of control. For sit-to-stand transfers using a walker or cane, a slightly higher bed can be helpful if it still allows stable foot placement and does not force hip hiking.
The simplest home test is direct observation. Have the person approach, turn, reach back, and sit the way they normally do. Watch whether they can scoot back without excessive effort, keep feet planted, and stand again without rocking repeatedly or pulling dangerously on furniture. If a caregiver assists, assess the caregiver’s posture too. Repeated bending, twisting, or lifting from an awkward bed height is a warning sign. Good transfer setup feels boring in the best way: repeatable, calm, and uneventful.
How bed height connects to transfer methods, mobility devices, and caregiver safety
Different transfer methods require different tolerances. A person using a rolling walker needs enough room to back up to the bed, reach for the mattress, and sit with control. A wheelchair user performing a stand-pivot transfer needs aligned surfaces, locked brakes, removed or swung-away footrests, and a stable landing area. Someone using a slide board needs the bed and chair surfaces at compatible heights and clear side access. Users of ceiling lifts or portable floor lifts need under-bed clearance, turning space, and a mattress height that lets the sling position work without awkward caregiver reaches.
Caregiver safety is part of bedroom accessibility, not a separate issue. According to safe patient handling principles used in healthcare, reducing manual lifting and optimizing working height lowers musculoskeletal strain. In homes, injuries often happen when a spouse or adult child tries to compensate for a poor setup by pulling under the arms or blocking the knees. That may work once, but it is not a durable solution. A better approach is to adjust the bed, use transfer belts appropriately, add a bedside handle if clinically appropriate, and create the same setup every time so neither person improvises.
Device compatibility also matters. If the wheelchair seat is 21 inches high and the bed is 26 inches high, an uphill lateral transfer may be unsafe. If a power wheelchair has large footplates and the bed frame has a protruding base, the angle of approach may force twisting. Hospital-style adjustable beds can solve some issues, but they are not always necessary. Standard beds can often be modified with risers, lower-profile foundations, or mattress changes, provided stability is maintained. The goal is not expensive equipment by default; it is predictable mechanics that fit the user’s real movement pattern.
Bedroom accessibility essentials beyond bed height
Once bed height is right, the rest of the bedroom must support the transfer and the overnight routine. Clear floor space on at least one transfer side is crucial. For many users, 36 inches is the minimum workable passage, while wheelchair users often benefit from 42 to 48 inches or more for approach and turning, depending on chair size. Pathways should be direct, free of baskets, cords, pet beds, and unstable rugs. Low-pile flooring or smooth hard surfaces generally allow easier walker and wheelchair movement than plush carpet, which can increase rolling resistance and trip risk.
Lighting is one of the most overlooked safety tools. Motion-activated night-lights between the bed and bathroom reduce hesitation and missteps. Switches should be reachable from the bed entrance and ideally from bedside level. A stable nightstand at the correct height helps users place glasses, a phone, medications, and water within easy reach, reducing risky reaching or unplanned standing. If the person uses CPAP, oxygen tubing, or charging cables for powered devices, route cords along walls with clips so they do not cross the transfer zone.
Bedside support products need careful selection. Bed rails can help with repositioning, but entrapment risk is real, especially with cognitive impairment or poorly matched mattress gaps. Many home users are better served by a well-designed bedside assist handle, provided it is compatible with the bed frame and the person does not rely on it for more force than it is rated to bear. An adjustable overbed table, a drop-arm commode for short-term use, or a pressure-redistributing mattress may also be valuable depending on the person’s needs. Good accessible bedroom design is individualized, but clutter reduction, stable surfaces, and unobstructed movement are universally useful.
Creating a safer bedroom-to-bathroom route
Bathroom and bedroom accessibility should be planned as a single route because many incidents happen between the two rooms. Start by examining the nighttime trip: rising from bed, walking or rolling to the door, navigating the hall, entering the bathroom, turning, toileting, washing hands, and returning to bed. Every step needs enough clearance, reliable lighting, and stable support. The route should be the shortest practical path, with thresholds minimized and door swings evaluated so they do not trap a mobility device or force a backward step.
In the bathroom itself, toilet height often needs to coordinate with bed height and transfer style. Comfort-height toilets are commonly about 17 to 19 inches to the seat, and adding a raised toilet seat may increase that further. For some users, matching the toilet seat height to the wheelchair or bed simplifies transfers. Grab bars should be anchored to framing or an approved mounting system, not attached with suction alone for weight-bearing support. A 1.25 to 1.5 inch bar diameter commonly offers a secure grip for many hands, and placement should reflect whether the user stands, pivots, or performs side transfers.
Showers and tubs deserve the same level of planning. A curbless shower with a handheld showerhead, non-slip flooring, and a correctly positioned shower seat can transform daily bathing. If a tub remains in use, a tub transfer bench may be safer than stepping over the wall. Lever-style faucet handles, anti-scald valves, and reachable towel storage improve independence. The accessible bathroom is not just a list of products; it is a sequence of tasks made easier through layout. When the bedroom supports getting up safely and the bathroom supports finishing the task without overreaching, the entire personal-care routine becomes more secure.
Practical setup steps, measurements, and common mistakes
The fastest way to improve an accessible bedroom is to measure first and buy second. I recommend documenting the current bed height, mattress compression under body weight, wheelchair seat or walker handgrip height, bedside clearance, doorway width, and the exact path to the bathroom. Photos and a sketch help reveal obstacles people stop noticing, such as a chest of drawers corner that catches a walker or a rug edge that lifts. If possible, trial adjustments with temporary solutions before replacing major furniture. Even putting a firm board under a sagging mattress or removing a thick topper can clarify whether height is the real issue.
| Setup factor | What to measure or check | Why it matters |
|---|---|---|
| Bed height | Floor to top of compressed mattress | Determines foot contact, sit control, and ease of standing or lateral transfer |
| Transfer-side clearance | Open floor space beside bed | Allows walker approach, wheelchair positioning, and caregiver access |
| Path to bathroom | Width, thresholds, cords, rugs, lighting | Reduces nighttime trips, slips, and device obstruction |
| Toilet and shower setup | Seat height, grab bar placement, entry design | Supports the second half of the transfer routine safely |
Common mistakes are consistent. People measure to the uncompressed mattress top, which overestimates functional height. They add thick pillow-top mattresses that feel luxurious but make transfers unstable. They place attractive benches or storage baskets in the exact zone needed for a walker turn. They install isolated grab bars without considering the movement sequence. Another frequent error is assuming that what works after surgery will still work six months later. Strength, endurance, swelling, pain, and assistive device use change over time, so bedroom accessibility should be reviewed whenever function changes.
When in doubt, involve a licensed occupational therapist or physical therapist with home safety experience. These clinicians can assess transfer mechanics, recommend equipment, and coordinate with ATPs, durable medical equipment suppliers, or contractors. For larger remodeling projects, look for professionals familiar with ADA concepts even in private homes, aging-in-place principles, and universal design. A safer accessible bedroom does not always require renovation, but it does require intentional choices backed by observation.
Setting the right bed height is the anchor decision for easier transfers, but the safest accessible bedroom is always part of a larger bathroom and bedroom accessibility plan. The most effective setup lets the user sit with feet flat, transfer with controlled movement, and reach the bathroom through a clear, well-lit, obstacle-free path. When bed height, mobility device fit, support equipment, and bathroom fixtures align, daily routines become less exhausting and far less risky.
The core lesson is simple: do not guess. Measure the bed at the compressed surface, compare it with the user’s body mechanics and transfer device, and test the full route from bed to bathroom. Small changes, such as lowering a mattress profile, adding motion-sensor lighting, repositioning furniture, or matching toilet and bed heights more closely, often deliver major gains in safety and independence. Larger needs may justify an adjustable bed, grab bars, a curbless shower, or professional home modification, but the principle remains the same: the environment should support the person, not force the person to fight the environment.
Use this hub as the starting point for every bathroom and bedroom accessibility decision in the home. Review your current setup, take measurements, and identify the first transfer that feels difficult or unsafe. Fix that point first, then improve the route around it. A safer bedroom begins with the bed, but lasting accessibility comes from planning the whole routine.
Frequently Asked Questions
What is the best bed height for easier transfers?
The best bed height for easier transfers is usually one that allows the person to sit on the edge of the mattress with both feet flat on the floor, knees bent at roughly 90 degrees, and hips slightly higher than the knees. This position gives better leverage for standing up, reduces the effort needed to shift weight forward, and helps create a more controlled transfer. In practical terms, many people do best when the top of the compressed mattress is close to the height of the back of the knee, but there is no single universal measurement because body height, leg length, strength, balance, pain levels, and transfer technique all matter.
For someone who performs a sit-to-stand transfer, a bed that is too low often increases strain on the knees, hips, and lower back because it requires more force to rise. A bed that is too high can be just as problematic because the feet may not make solid contact with the floor, reducing stability and making it harder to push up safely. If the person uses a wheelchair, the bed height often needs to work with the wheelchair seat height as well, especially for lateral transfers. In those cases, having the bed at or near the wheelchair seat height may reduce uphill or downhill sliding during the transfer.
The safest approach is to test bed height under real conditions: shoes on or off as normally used, mattress compressed by body weight, and mobility equipment positioned as it would be during an actual transfer. A setup that feels acceptable during the day may not work as well at night when fatigue, pain, stiffness, and urgency are greater. That is why individualized setup matters more than following a generic standard.
How do I measure bed height correctly for safe transfers?
To measure bed height correctly, measure from the floor to the top of the mattress surface where the person actually sits, not just to the bed frame or the uncompressed mattress. Because mattresses compress under weight, the most useful measurement is the functional sitting height. If possible, have the person sit on the edge of the bed in their usual transfer position and check whether their feet rest fully on the floor, whether the knees are near a right angle, and whether they can lean forward and stand without excessive effort or instability.
It is also important to measure the related surfaces involved in the transfer. If the person transfers to and from a wheelchair, transport chair, bedside commode, or lift chair, compare those seat heights to the bed height. Small differences can make a big impact. Even a gap of a few inches may turn a smooth lateral transfer into a difficult uphill move or create too much downward drop for safe control. For some people, a slight height difference is helpful, but for many, a closer height match improves predictability and reduces strain.
Do not forget environmental details. Thick carpet, soft flooring, slippers, and mattress toppers can all change the effective height. Adjustable beds may also sit higher or lower depending on the base design. If the person receives help from a caregiver, observe whether the height allows the caregiver to assist without bending awkwardly or twisting. Safe transfer setup should support both the person moving and the person helping.
Is an adjustable bed better for accessibility and safer transfers?
An adjustable bed can be an excellent option for accessibility, but it is only better if its height range and features truly match the person’s transfer needs. One major advantage is flexibility. A height-adjustable bed can be lowered for getting in and out, then raised for caregiver assistance, dressing, or reducing bending during care. That ability to fine-tune the bed height can make a meaningful difference in safety, comfort, and independence, especially when needs vary throughout the day.
Adjustable positioning features can also help with bed mobility. Raising the head of the bed may make it easier for a person to move from lying down to sitting. Elevating the knees can improve comfort for some conditions, although it should be used thoughtfully so it does not interfere with the ability to scoot forward for a transfer. Some people benefit from using the bed’s controls to create a more upright starting position before standing, but others may need a flatter setup to move more freely. It depends on strength, trunk control, pain, and technique.
That said, not every adjustable bed is automatically transfer-friendly. Some models are too high even at their lowest setting, especially once a thick mattress is added. Others have soft edge compression that makes sitting less stable. Before choosing one, check the minimum and maximum height from floor to top of the mattress, whether side rails or assist handles are compatible, and whether there is enough clearance for mobility aids. If transfers are complex or if the person has had falls, consulting an occupational therapist or physical therapist can help ensure the bed setup supports real-life use rather than just sounding good on paper.
What should I do if the bed is too high or too low?
If the bed is too high or too low, the best solution is to change the setup rather than simply trying to “be careful.” Repeatedly using a poorly matched bed height increases the risk of falls, sliding, shoulder strain, skin injury, and caregiver back pain. If the bed is too high, possible fixes include removing casters, switching to a lower-profile foundation, using a thinner mattress if clinically appropriate, or replacing the frame with a lower one. If the bed is too low, bed risers, a different frame, or a higher foundation may help, but any change must be stable and appropriate for the weight and movement demands of transfers.
You can also modify the transfer environment to improve safety while the bed height is being addressed. Non-slip footwear, proper lighting, a clear path to the bathroom, a securely placed walker, and grab bars or transfer aids nearby may all reduce risk. For people who use lateral transfers, a transfer board may help in some cases, but it should be chosen based on the person’s skills and not used as a substitute for proper setup. If a caregiver is assisting, review body mechanics and positioning so the helper is not lifting from a poor angle caused by the bed height.
Temporary workarounds should be used carefully. For example, stacking cushions, using unstable stools, or improvising with household items is rarely a safe long-term answer. If the person is recovering from surgery, has progressive weakness, or has started avoiding getting out of bed because transfers feel difficult, that is a strong sign the current setup needs to be reassessed. A small equipment adjustment often solves a much bigger functional problem.
When should I get professional help to set up bed height for transfers?
You should get professional help when transfers are painful, inconsistent, unsafe, or require more assistance than before. Warning signs include sliding off the edge of the bed, needing multiple attempts to stand, feet not reaching the floor well, frequent near-falls, increased caregiver strain, or new difficulty with nighttime toileting. Professional input is especially valuable after hospitalization, surgery, stroke, a fall, or any change in strength, balance, sensation, or cognition. In these situations, the “right” bed height may have changed even if the bed itself has not.
An occupational therapist or physical therapist can evaluate how the person moves from lying to sitting, how they position their feet and hands, how much forward trunk lean they can manage, and whether they are safest with sit-to-stand, pivot, or lateral transfers. They can also look at the full bedroom setup, including wheelchair fit, walker placement, flooring, lighting, bedside commode height, and caregiver technique. This kind of whole-room assessment often identifies problems that are easy to miss when focusing on the bed alone.
Professional guidance is also useful when buying equipment. A therapist can help determine whether a standard frame, hospital bed, low bed, adjustable bed, bed rail, transfer pole, or alternative mattress height is most appropriate. That can save money and prevent the common mistake of purchasing equipment that looks accessible but does not work for the individual’s body mechanics. If safer transfers are the goal, expert assessment can turn a frustrating bedroom setup into one that supports confidence, comfort, and daily independence.