Converting a bathroom for wheelchair accessibility is one of the most valuable home accessibility modifications a homeowner can make because it directly improves safety, independence, hygiene, and long-term usability. In practical terms, an accessible bathroom is designed so a wheelchair user can enter, turn, transfer, bathe, and use fixtures with minimal strain and reduced fall risk. That means wider doorways, sufficient turning radius, curbless shower entry, properly placed grab bars, reachable controls, slip-resistant flooring, and enough clear floor space at the toilet and sink. I have worked on bathroom retrofit planning with contractors, occupational therapists, and families balancing mobility needs with budget limits, and the biggest lesson is simple: small layout mistakes create daily frustration, while thoughtful design can restore dignity immediately. This topic matters because bathrooms are among the most hazardous rooms in any house, especially for people with reduced mobility, and because smart remodeling choices often support aging in place for years.
As a hub within home accessibility modifications, this guide explains the major decisions that shape a wheelchair-accessible bathroom and helps readers understand how bathroom work connects with broader mobility planning across the home. Many projects start with one visible issue, such as a shower threshold or narrow door, but successful results usually depend on coordinated changes involving hallways, lighting, flooring transitions, storage, and emergency access. The most reliable approach is to treat the bathroom as part of a larger accessibility strategy rather than an isolated renovation.
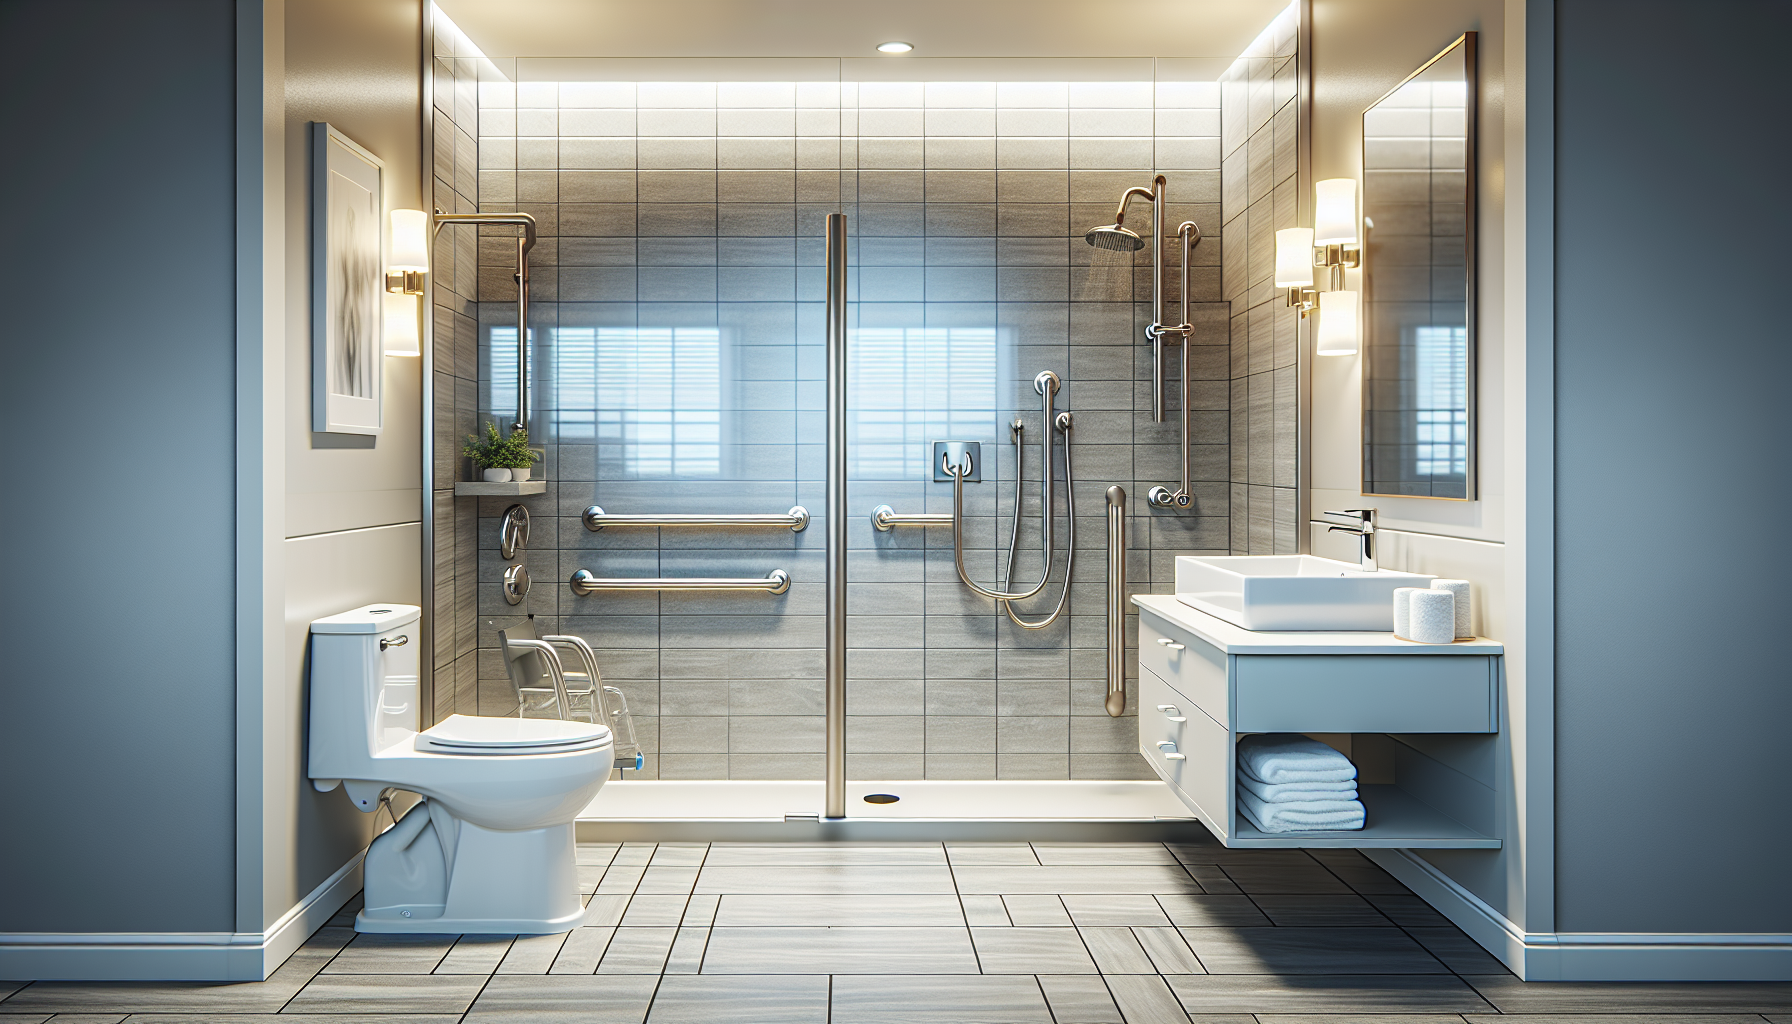
What a wheelchair-accessible bathroom must include
A wheelchair-accessible bathroom is not defined by one product. It is defined by clearance, approach, transfer support, and ease of use. In most remodels, the first priority is circulation space. A wheelchair typically needs enough clear floor area for forward approach at fixtures and adequate room to turn, often planned around a 60-inch turning circle or an equivalent T-turn. Even when a room is smaller, careful fixture placement can improve maneuverability dramatically. I have seen bathrooms become functional without expanding the footprint simply by replacing a bulky vanity, moving the toilet a few inches, and eliminating a tub deck that blocked lateral movement.
Door access is another foundational element. A standard bathroom door can be too narrow for many wheelchairs, and inward-swinging doors can trap a user after a fall. Widening the opening to 32 inches clear minimum, with 36 inches preferred, is common practice. Pocket doors and outswing doors often solve clearance problems, though pocket doors need quality hardware and wall conditions that allow installation. Lever handles are better than round knobs because they require less grip strength. Thresholds should be low or beveled to reduce rolling resistance and trip risk.
Once inside, every fixture should support either a parallel transfer, angled transfer, or direct forward use. Toilets need surrounding space and stable grab bars. Sinks should allow knee clearance underneath and have insulated pipes to prevent contact burns. Mirrors should be mounted for seated visibility. Faucets should be operable with one hand, using levers, touch controls, or sensors. Good accessible design reduces reach distance, twisting, and force requirements rather than merely adding assistive hardware after the fact.
Layout planning, measurements, and circulation
Layout drives success more than finishes or product cost. Before choosing fixtures, measure the room carefully and map walls, door swings, plumbing locations, electrical points, window placement, and obstructions such as radiators or soffits. Then measure the wheelchair itself, including width, turning behavior, footrest projection, and whether the user self-propels or receives assistance. A manual chair used by an active adult creates different planning needs than a larger power chair with a wider turning radius. If transfers require caregiver help, the bathroom must accommodate two people safely, not just one chair.
In actual remodel planning, I start with three movement questions. Can the user get through the doorway without scraping hands? Can they turn or reposition near the toilet and shower? Can they reach controls without overstretching? Those questions expose most design failures quickly. A room can meet general dimensions on paper yet remain awkward because a towel bar, vanity edge, or door casing intrudes into usable space. Templates on the floor using painter’s tape are inexpensive and reveal circulation issues before demolition begins.
| Bathroom feature | Common accessible target | Why it matters |
|---|---|---|
| Door opening | 32 inches clear minimum, 36 preferred | Allows wheelchair passage and reduces hand injury risk at jambs |
| Turning space | 60-inch diameter or T-turn equivalent | Supports repositioning and independent maneuvering |
| Shower entry | Zero-threshold or very low beveled entry | Eliminates barrier at the wet area |
| Toilet clearance | Open side transfer space plus grab bar backing | Improves transfer safety and caregiver access |
| Sink height and knee space | Wall-hung or open base vanity with clear approach | Permits seated grooming and handwashing |
When space is limited, prioritization matters. If you cannot achieve ideal clearance at every point, preserve the transfer zone at the toilet and a barrier-free shower first. In many homes, a neighboring closet or part of a hallway can be borrowed to enlarge the bathroom footprint. That may sound disruptive, but it is often more cost-effective than forcing custom products into an undersized room that will never function properly. Good design is less about luxury and more about clear movement paths.
Accessible showers, tubs, and bathing safety
The shower is usually the center of a wheelchair-accessible bathroom conversion because it combines water, slippery surfaces, transfers, and fatigue. For most wheelchair users, a curbless shower is the best solution. The floor slopes gently to a linear or center drain so the user can roll in without crossing a lip. This design also helps people using walkers and reduces caregiver lifting. In retrofit projects, recessing the floor may require joist modifications or a pre-sloped shower system, so structural review is important before finalizing the plan.
A properly designed accessible shower includes more than a zero-threshold pan. It should have a handheld shower on a slide bar, pressure-balanced or thermostatic valve, easy-to-reach controls placed near the entrance, and a stable seat. Fold-down seats save space, while freestanding rolling shower chairs offer flexibility for users who need full support. Wall reinforcement for grab bars should be installed during construction even if final bar placement will be confirmed later. I strongly recommend textured tile or a tested slip-resistant surface because polished tile can become hazardous even when the room looks modern and clean.
Bathtubs are harder to use safely for many wheelchair users, but not always impossible. Walk-in tubs can help some people who can step over a low threshold and sit, yet they are not ideal for users who cannot transfer independently or who cannot tolerate waiting in a tub while it fills and drains. Tub transfer benches remain useful in some homes, especially during phased renovations, but they should not be treated as equal to a well-built roll-in shower. When choosing between tub retention and shower conversion, the deciding factors are transfer ability, caregiver involvement, skin tolerance, and emergency egress if a user becomes weak during bathing.
Toilets, sinks, storage, and reachable controls
Toilet usability depends on height, side access, and secure support. Comfort-height toilets can ease transfers for many adults, though seat height should match the user’s wheelchair and transfer method rather than follow a trend blindly. Too high can be as problematic as too low. Grab bars should be anchored into proper blocking, not hollow wall anchors alone. A side bar and rear bar are common, but exact placement should reflect whether the user transfers from the left, right, or front. Bidet seats are increasingly valuable because they improve hygiene and reduce caregiver assistance, especially for users with limited trunk balance or shoulder motion.
Sinks work best when they provide open knee clearance, shallow depth, and controls within easy reach. Wall-mounted sinks are often simpler than large vanities, although some accessible vanities now conceal plumbing while preserving clear space underneath. Insulating hot water pipes is essential. Mirrors should either extend low enough for seated users or tilt downward. Medicine cabinets and frequently used toiletries should be mounted within a reachable zone; otherwise, the room may be technically accessible but functionally frustrating. I often advise clients to store daily items openly and move decorative storage higher, reversing the priorities seen in conventional bathrooms.
Controls matter more than many people expect. Light switches should be mounted where they can be reached from seated height, and rocker or paddle switches are easier than small toggles. Exhaust fans should be quiet and effective enough to manage moisture, because damp air increases slip risk and mold growth. Anti-scald protection is essential at showers and sinks. Good lighting should include even overhead illumination and task lighting at the mirror to reduce shadows, which can affect users with low vision as well as caregivers assisting with grooming or medication routines.
Flooring, lighting, ventilation, and safety details
Flooring must balance traction, cleanability, and rolling resistance. Very rough surfaces can impede wheelchairs, while glossy surfaces increase slip risk. In most accessible bathrooms, textured porcelain tile, slip-resistant sheet vinyl, or well-installed luxury vinyl with appropriate wet-area detailing are practical choices. Grout joints should be consistent and manageable, and transitions between rooms should be flush or gently beveled. I avoid thick bath mats in wheelchair bathrooms because they bunch under wheels and become transfer hazards. If softness is needed, choose low-profile mats with secure backing and keep them outside key turning areas.
Lighting should be layered. Overhead fixtures alone create shadows near the toilet and vanity, where precision matters. Add mirror lighting, shower-rated fixtures where appropriate, and nighttime pathway lighting if the bathroom is used after dark. Motion-activated lights can be useful, but they must not turn off during longer bathing tasks. Electrical outlets should be protected by ground-fault circuit interrupters and placed where grooming tools can be used from a seated position without cords crossing pathways. Heated flooring is not essential, yet it can improve comfort for users who spend longer periods in the room and may be sensitive to cold surfaces.
Safety details often determine whether the remodel performs well over time. Rounded counter corners reduce impact injury. Contrasting colors between wall, floor, and fixtures can help people with low vision distinguish surfaces. Shower curtains may outperform glass enclosures because they create more flexible access space, though high-quality frameless glass can work if the opening is wide enough and hardware is reachable. An emergency call button or smart alert device can be a sensible addition in households where falls or medical episodes are a concern.
Costs, codes, contractors, and planning the wider home
The cost to convert a bathroom for wheelchair accessibility varies widely based on structural work, plumbing relocation, finish quality, and product selection. A modest retrofit with grab bars, a toilet adjustment, a handheld shower, and minor doorway work may cost a few thousand dollars, while a full gut renovation with a curbless shower, widened entry, new electrical, waterproofing, and custom cabinetry can easily reach the mid five figures or more. The expensive parts are usually labor, plumbing changes, waterproofing, and structural adjustments, not the visible accessories. Spending strategically matters. I would prioritize layout, waterproofing, backing, and safe surfaces before premium tile or decorative fixtures every time.
Code compliance and best practice are related but not identical. Residential bathrooms may not be legally required to mirror every commercial accessibility dimension, yet established accessibility standards remain the best design reference for clearances, reach ranges, and grab bar zones. A knowledgeable contractor should understand waterproofing systems, slope requirements for curbless showers, blocking installation, and how to coordinate with electricians and plumbers. For complex needs, involve an occupational therapist or certified aging-in-place specialist early. Their input can prevent expensive rework by matching the design to actual transfer techniques and equipment use.
This bathroom guide also serves as a hub for broader home accessibility modifications. Bathroom access depends on an uninterrupted route from bedroom or living area to the door, which may require ramp solutions, stairlift alternatives, hallway widening, non-slip flooring, smart home controls, or improved entry lighting elsewhere in the house. If you are planning multiple upgrades, document them in phases so contractors can sequence work efficiently and preserve future options. Start with a measured assessment, identify the user’s real daily challenges, and build a bathroom that supports independence not just today, but through the next stage of mobility as well.
Converting a bathroom for wheelchair accessibility succeeds when the room is planned around real movement, not assumptions. The essential elements are a usable layout, barrier-free bathing, safe transfers, reachable controls, durable slip-resistant surfaces, and products matched to the user’s body size, wheelchair type, and support needs. The best projects also connect the bathroom to a larger home accessibility modifications plan, so the route in and out of the room is as functional as the room itself.
If you remember one principle, make it this: clearance and safety come before style, but good accessible design can absolutely look refined and modern. Measure carefully, consult experienced professionals, and prioritize the changes that restore independence fastest. If you are beginning a remodel, start with a full accessibility assessment of the bathroom and the path leading to it, then use that plan to guide every decision that follows.
Frequently Asked Questions
What features are most important when converting a bathroom for wheelchair accessibility?
The most important features are the ones that improve safe movement, easy transfers, and independent daily use. In most cases, that starts with entry access. A wheelchair-accessible bathroom should have a doorway wide enough for the user’s chair, often at least 32 inches of clear opening, and enough floor space inside for comfortable maneuvering. Many remodels also include a 5-foot turning radius or a comparable T-turn space so the user can reposition without hitting walls, vanities, or fixtures. Layout matters just as much as dimensions, because an otherwise large bathroom can still feel unusable if the toilet, sink, and shower are placed too tightly together.
Beyond circulation space, the biggest priorities are a curbless shower, properly installed grab bars, an accessible toilet setup, and a sink that can be used from a seated position. A roll-in or low-threshold shower reduces tripping hazards and makes bathing much safer than stepping over a tub wall. Grab bars near the toilet and in the bathing area provide support during transfers and help reduce fall risk. An accessible sink typically includes knee clearance underneath, insulated or protected plumbing, and controls that are easy to reach and operate. Faucets, shower controls, mirrors, lighting, and storage should all be placed at practical heights for a seated user.
Slip-resistant flooring is another key feature that should never be overlooked. Bathrooms are naturally wet environments, and smooth, glossy finishes can become dangerous very quickly. Good lighting, anti-scald controls, hand-held shower wands, a shower bench or fold-down seat, and comfort-height fixtures also add meaningful usability. The best accessible bathrooms are not just technically compliant on paper; they are designed around the real routines, physical abilities, and equipment needs of the person using the space every day.
How much space is needed for a wheelchair-accessible bathroom?
The amount of space needed depends on the wheelchair type, the user’s mobility level, and the bathroom’s layout, but adequate maneuvering room is essential. A common planning benchmark is a 60-inch diameter turning space for a wheelchair, although some layouts can work with a T-shaped turning area instead. It is also important to leave clear floor space in front of and beside major fixtures so the user can approach them directly and position the chair for transfers. For example, the toilet should have enough side clearance for a lateral transfer, and the sink should have open space in front for a forward approach.
Space planning should also account for door swing, fixture depth, and the chair’s turning path. In many accessibility remodels, a traditional swinging door is replaced with an out-swing door or pocket door to free up floor area inside the bathroom. Vanities may need to be shortened or replaced with wall-mounted sinks to improve access. Showers often require more room than standard tub-shower combinations, especially when designed as roll-in showers with a bench and transfer space. Even small bathrooms can sometimes be adapted successfully, but they usually require thoughtful redesign rather than simply swapping out fixtures.
The most effective way to determine space needs is to measure the wheelchair itself and design around the actual user. A compact chair, a power chair, and a transport chair all create different clearance demands. If a caregiver will regularly assist with bathing or toileting, extra room should be included for that as well. In practice, the goal is not just to meet a minimum measurement but to create a bathroom that feels workable, safe, and comfortable during real everyday use.
What is the best shower or bathing option for someone who uses a wheelchair?
For many wheelchair users, a curbless or roll-in shower is the best bathing option because it eliminates the need to step over a tub edge or shower curb. This significantly reduces fall risk and makes transfers simpler and safer. A properly designed accessible shower typically includes a flush entry, slip-resistant flooring, a hand-held shower wand, easy-to-reach controls, and at least one secure grab bar. Many homeowners also add a built-in bench or fold-down seat, which can be especially helpful for users who transfer out of the chair before bathing.
That said, the right choice depends on whether the user prefers independent bathing, assisted bathing, or seated transfer bathing. Some people benefit most from a true roll-in shower that allows direct wheelchair entry. Others may prefer a transfer shower, where the user moves onto a bench from the wheelchair and then bathes while seated. Walk-in tubs can be useful in certain situations, but they are not always the best wheelchair-accessibility solution because they still require a transfer and typically involve entering before the tub is filled and waiting inside while it drains. For users with limited balance, limited stamina, or caregiver support needs, this may not be ideal.
It is also important to think about the full bathing experience, not just the shower entry. Controls should be reachable from both inside and outside the spray area if possible. The showerhead should be adjustable, the drain should be positioned to avoid water pooling where the wheelchair or user sits, and shelving should be mounted at a usable height. Waterproofing, floor slope, and drainage must be done correctly so the bathroom remains safe and dry. A well-designed accessible shower should support comfort, dignity, and ease of use every day, not just satisfy a checklist of features.
Where should grab bars, toilets, and sinks be placed in an accessible bathroom?
Placement is critical because even high-quality fixtures can be difficult or unsafe to use if they are installed in the wrong location. Grab bars should be positioned where they provide real transfer support, most commonly near the toilet and inside the shower. Around the toilet, users often need support on the side wall, rear wall, or both, depending on the transfer method. In the shower, grab bars are typically installed on walls that help with entry, standing balance, seated stability, and exiting. These bars must be securely anchored to wall framing or blocking and installed to support substantial weight; decorative towel bars are not a substitute.
Toilets in accessible bathrooms are often set at a comfort or ADA-style height to make transfers easier. Just as important, there should be enough clear space beside the toilet for the wheelchair to pull alongside. The ideal placement depends on whether the user transfers from the left, right, or front, so the remodel should be tailored to the individual whenever possible. Toilet paper holders, flush controls, and bidet controls should also be within easy reach and should not interfere with grab bar use.
Sinks should be mounted at a height that allows comfortable use from a seated position, with open knee and toe clearance below. Plumbing underneath should be insulated or configured to prevent burns or scrapes. The faucet should be easy to operate, with lever handles, touch controls, or motion activation often working better than small twisting knobs. Mirrors, medicine cabinets, outlets, and storage should also be installed at reachable heights. In short, successful placement is about supporting natural movement and reducing strain, not simply fitting items into the room.
How much does it cost to convert a bathroom for wheelchair accessibility, and is it worth the investment?
The cost of converting a bathroom for wheelchair accessibility can vary widely depending on the bathroom’s size, the home’s existing structure, the level of customization required, and whether the remodel is partial or comprehensive. A modest update with grab bars, a comfort-height toilet, improved lighting, and a few fixture changes may cost far less than a full renovation involving doorway widening, plumbing relocation, a curbless shower, new flooring, and custom cabinetry. If electrical work, structural framing, waterproofing, or subfloor modifications are needed, the total cost will rise accordingly. Labor rates and material choices also play a major role.
Although costs can be significant, many homeowners find that the investment is well worth it because bathroom accessibility has a direct impact on safety, independence, and quality of life. Bathrooms are one of the highest-risk areas in any home due to slippery surfaces, tight spaces, and frequent transfers. A well-planned remodel can reduce fall risk, make personal care easier, lessen caregiver strain, and allow someone to remain in their home longer rather than relocating to a more supportive environment. For aging in place, disability accommodation, or post-injury recovery, that can make accessible bathroom modifications one of the most valuable improvements a homeowner can make.
There may also be long-term practical benefits beyond daily convenience. A safer bathroom may help avoid injury-related expenses, support future mobility changes, and increase the home’s appeal to buyers looking for universal design features. In some cases, grants, local assistance programs, veterans’ benefits, medical-related funding sources, or tax considerations may help offset part of the cost, depending on location and circumstances. The best approach is to treat the project as both a functional safety upgrade and a long-term usability investment, with design decisions guided by the user’s real needs rather than short-term appearances alone.