Grab bars are one of the simplest home accessibility modifications, yet they have an outsized effect on safety, independence, and confidence in daily life. In homes I have assessed for older adults, wheelchair users, and people recovering from surgery, the right bar in the right place often prevents the kind of fall that leads to hospitalization, fear of movement, and loss of independence. This guide explains grab bars 101, with practical placement tips for every room and a broader look at home accessibility modifications so this page can serve as your hub for planning a safer, easier-to-use home.
A grab bar is a fixed support rail designed to bear body weight and provide stability during standing, sitting, transferring, stepping over thresholds, or navigating slippery surfaces. It differs from a towel bar or decorative rail because it is engineered for load, mounted into solid backing or studs, and installed to meet strict performance expectations. In the United States, many professionals reference ADA Standards for Accessible Design for dimensions and clearances in public settings, while residential projects often draw from those principles and adapt them to the user’s height, strength, diagnosis, and routines.
Home accessibility modifications include any change that reduces physical barriers and improves safe use of the home. That umbrella includes grab bars, ramps, stair lifts, handrails, curbless showers, widened doorways, lever handles, improved lighting, non-slip flooring, smart home controls, lowered countertops, and transfer-friendly toilet and bathing layouts. Grab bars sit at the center of this category because they are relatively affordable, quick to install, and useful across many conditions, from arthritis and Parkinson’s disease to balance disorders, stroke recovery, pregnancy, and temporary injury.
Placement matters because a badly located bar can be almost as useless as having no bar at all. I routinely see bars mounted where they look symmetrical on the wall but cannot be reached during the risky part of a transfer. Effective placement starts with task analysis: where does the person pause, pivot, push, pull, or lose balance? It also requires understanding wall structure, user grip strength, and future needs. A home that works today for a cane user may need to support a walker or seated transfer next year. Thoughtful grab bar placement helps a home age in place gracefully.
How to Choose Grab Bars That Work in Real Homes
The best grab bar is not simply the strongest one on the shelf. It is the one that matches the user, the task, and the room. Diameter is important because grip comfort changes with hand size and arthritis. Many users do well with bars around 1.25 to 1.5 inches in diameter, which aligns with common accessibility guidance. Surface texture matters too. A lightly textured or peened finish can improve grip in wet areas, while highly polished bars may become slippery when soapy. Stainless steel remains the workhorse material because it resists corrosion and performs well over time.
Bar length should reflect the movement being supported. A short 12-inch bar near a shower entry may help with a single step, but a 24- to 42-inch bar often provides a safer gripping zone for movement across a wider range. Shape also matters. Straight horizontal bars are versatile and easy to understand. Vertical bars help with hand placement at entry points. Angled bars can support sit-to-stand movement by accommodating natural wrist position, though they should be chosen carefully because inconsistent angles can confuse users with low vision or cognitive changes.
Weight rating claims deserve scrutiny. Most quality grab bars are tested for substantial loads, but the bar itself is only part of the equation. The wall assembly and anchoring method determine whether the system can support a real-world fall arrest or forceful transfer. Whenever possible, mount into studs or solid wood blocking. Hollow-wall anchors may be appropriate only where the manufacturer specifically allows them and where wall construction supports the rated load. In tile showers, I prefer planning reinforcement during renovation because it creates more placement freedom and greater long-term reliability.
Style should not be dismissed. Modern grab bars come in finishes that blend with faucets and hardware, including brushed nickel, matte black, and white. When appearance improves acceptance, users are more willing to install bars before a crisis. Some products combine functions, such as toilet paper holder bars, shelf bars, or towel shelf supports, but combination products should still be selected based on verified load performance, not convenience alone. If a product does not clearly state that it is a true grab bar, assume it is not suitable for weight-bearing support.
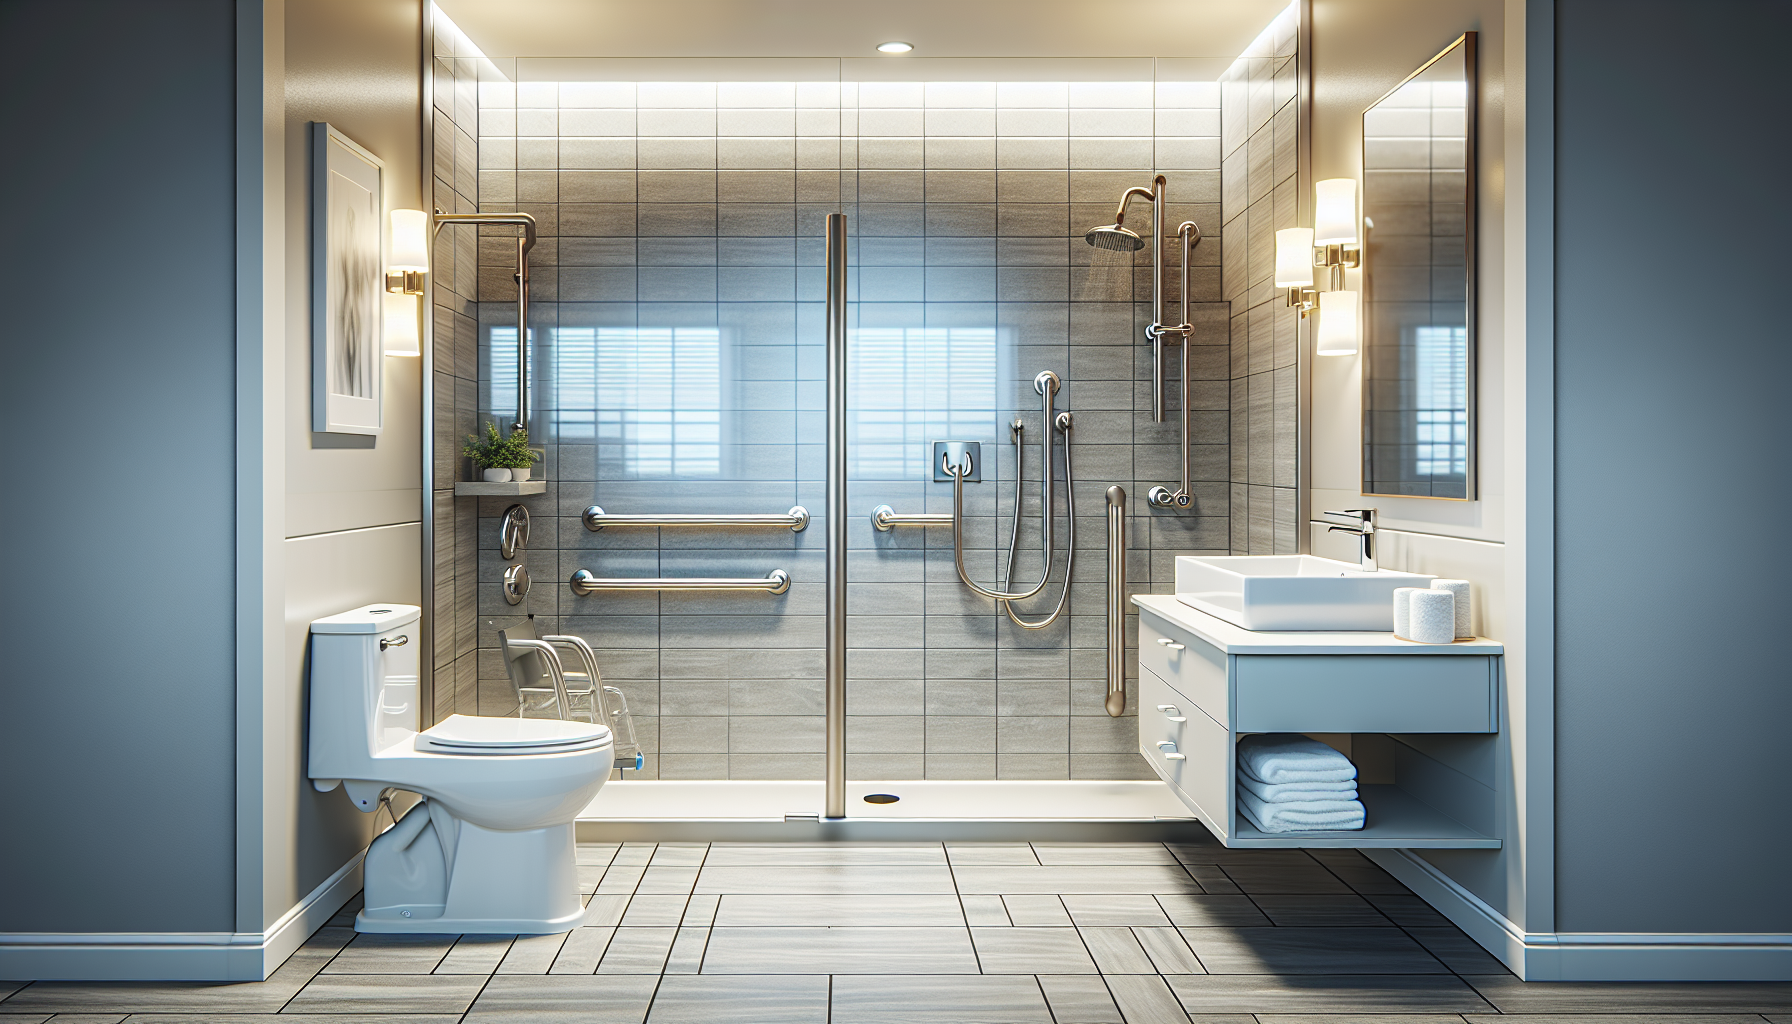
Bathroom Grab Bar Placement: Toilets, Tubs, and Showers
The bathroom is where most people start with home accessibility modifications because wet surfaces, hard flooring, and confined spaces create a high fall risk. Around toilets, the goal is to support lowering, rising, and pivoting. In many layouts, the most effective setup is a horizontal side wall bar paired with a rear wall bar when space allows. In a narrow residential bathroom, even one well-placed side bar can make a major difference. Typical heights often land in the low- to mid-30-inch range from the floor, but exact placement should match the user’s elbow height and transfer style.
For toilet transfers, distance from the front edge of the toilet matters more than homeowners expect. If the bar starts too far back, the user cannot reach it during the hardest part of standing. If it extends too far forward without enough clearance, it may interfere with approach from a walker. Fold-down support rails can help where wall space is limited or when wheelchair side transfers are needed, but they must be mounted to structural backing designed for the load. In several aging-in-place projects, adding a taller toilet plus a properly located side bar dramatically improved independent toileting.
Tub areas need bars for entry, exit, and controlled lowering to a seat if bathing in the tub continues. A vertical bar near the tub’s entry edge gives a reliable target handhold during the step-in motion. Once inside, a horizontal bar on the long wall helps with balance while standing or shifting position. What does not work well is placing a single short bar high on the back wall and expecting it to solve every movement problem. The movement sequence should guide the layout: approach, step over, turn, lower, rise, and step out.
Showers benefit from the most deliberate planning. In a walk-in shower, I usually recommend at least one entry bar and one interior horizontal bar, with added bars depending on whether the user stands, uses a shower chair, or transfers from a wheelchair. Bars should support use of controls without forcing the person to stand under cold water while reaching. Handheld shower wands on slide bars are helpful, but slide bars are not automatically grab bars unless specifically rated and installed as such. Curbless showers, slip-resistant tile, adequate drainage, and seating often work best in combination with grab bars.
| Room or Area | Primary Purpose | Best Bar Orientation | Key Placement Tip |
|---|---|---|---|
| Toilet | Sit-to-stand support | Horizontal or fold-down | Place where the user can reach it before lift-off begins |
| Tub entry | Step-over stability | Vertical | Mount at the entry point, not centered for appearance |
| Shower interior | Standing balance and transfers | Horizontal | Align with shower seat and control location |
| Hallway transition | Steadying during movement | Horizontal | Use where direction changes or thresholds create instability |
Placement Tips for Bedrooms, Hallways, Entryways, and Stairs
Bedrooms are often overlooked, yet they are a common site of falls during nighttime toileting, dressing, and bed transfers. A grab bar near the bed can help with repositioning, rolling, and moving from lying to sitting if the frame and wall layout support safe use. In some cases, a floor-to-ceiling pole or bed assist rail is more appropriate than a wall-mounted bar, especially when the bed is not near a structurally suitable wall. Good bedroom accessibility also includes clear pathways, motion-activated lighting, and enough space for a walker on both sides if caregiving assistance is needed.
Hallways and transitional spaces are where subtle instability shows up. People may not think they need support there until they begin wall-walking, pausing at turns, or bracing on door casings. Continuous handrails are often better than short grab bars in these zones because they provide ongoing support over distance. Still, targeted bars can help near tight turns, threshold changes, or spots where flooring transitions become slippery. If the home has long routes between bedroom and bathroom, improving those routes may do as much for fall prevention as adding equipment inside the bathroom itself.
Entryways deserve careful attention because they combine weather exposure, level changes, and carrying tasks. An exterior grab bar near a single step can be valuable, but in many cases a full handrail is the more effective solution. The distinction is practical: handrails guide travel along stairs or ramps, while grab bars stabilize a specific movement. At a front door, I often recommend a layered approach that includes a rail at steps, a bar or supportive jamb-side handle near the threshold, better lighting, non-slip surfaces, and a landing large enough for a walker, rollator, or wheelchair to pause safely.
Stairs require special care. On stairways, code-compliant handrails on at least one side are essential, and two-sided rails are often better for aging in place. Grab bars may supplement stair use at the top or bottom where the person turns, reaches for the door, or negotiates an awkward last step, but they should not substitute for proper stair rails. Other useful stair modifications include contrast nosings, brighter lighting, reduced clutter, and evaluating whether a stair lift is needed. When stairs become unsafe despite rails, the right answer may be changing room use or creating a first-floor living setup.
Installation, Safety Standards, and Common Mistakes to Avoid
Proper installation is the difference between a reliable support and a dangerous false sense of security. Every installer should verify wall composition before drilling. Tile over drywall, fiberglass surrounds, plaster, and stone each require different techniques. Stud finders can be unreliable through dense finishes, so small inspection holes, access from the opposite side, or renovation photos can be invaluable. In remodeling, adding plywood blocking between studs at strategic heights creates future flexibility. This is standard best practice in accessible bathroom design because user needs change and bars often need repositioning later.
Clearance around the bar matters almost as much as anchoring. Users need enough space to wrap fingers fully around the bar without scraping knuckles on the wall. Accessibility guidance commonly references about 1.5 inches of clearance from the wall, and that dimension exists for a reason: cramped clearance weakens grip. End returns that curve back to the wall reduce the chance of clothing or bag straps catching. In wet rooms, seal penetrations carefully to protect the wall assembly from moisture intrusion, especially in tiled showers where hidden leaks can cause structural damage over time.
The most common mistake I see is prioritizing symmetry over function. Homeowners often ask for bars centered perfectly on a wall or aligned with tile lines, but the safest placement follows the user’s body mechanics, not visual balance. Another mistake is mounting bars too low because they are intended for pulling up from a seated position. Most users do better when bars support forearm leverage and upright posture rather than forcing a deep pulling motion from below. A third mistake is confusing temporary suction devices with true safety equipment. Suction grips may assist with balance cues, but they are not dependable weight-bearing supports.
Professional assessment adds value when needs are complex. Occupational therapists, certified aging-in-place specialists, accessibility contractors, and experienced remodelers can evaluate transfer patterns, mobility devices, and caregiver workflow. In many cases, the grab bar is only one part of a more effective plan. That plan may include a shower seat, raised toilet seat, offset hinges to widen clear width, better task lighting, smart switches, or a no-step entry. The best home accessibility modifications work as a system, reducing strain across the whole daily routine rather than solving one isolated moment.
How Grab Bars Fit Into a Whole-Home Accessibility Plan
Grab bars are most effective when they are part of a broader strategy for home accessibility modifications. Start with the highest-risk tasks: bathing, toileting, entering the home, and moving at night. Then look at route accessibility, including doorway width, floor surfaces, thresholds, and turning space. A beautifully installed shower bar does not solve the problem if the user cannot get through the bathroom door with a walker. Likewise, a toilet bar may help, but poor lighting or a loose bath rug can still create danger. Whole-home planning prevents these fragmented solutions.
Budgeting should focus on impact first. In real projects, relatively modest changes often produce the greatest immediate benefit: grab bars, handheld showers, raised toilets, lever handles, brighter lighting, secure railings, and threshold reductions. Larger renovations, such as curbless showers or widened doorways, are worthwhile when they match long-term needs and the home’s structure. Some clients choose to pre-block bathroom walls during unrelated remodeling so future bars can be added quickly. That is one of the smartest low-cost decisions available because it preserves options without forcing premature visible changes in every room.
There is also an emotional side to accessibility work. People may resist grab bars because they associate them with decline. I have found that acceptance improves when the conversation centers on control, confidence, and staying in the home longer. Design helps too. Attractive finishes, integrated accessories, and thoughtful placement can make bars feel intentional rather than institutional. Framing the project as universal usability is accurate: children, pregnant adults, athletes with injuries, and visitors all benefit from safer bathrooms and easier transitions. Accessibility modifications are not niche upgrades; they are practical design improvements.
Grab bars earn their value by making everyday movements safer, but their real benefit is bigger: they support independence across the entire home. The right bar, mounted to proper backing and placed where the hand actually needs it, can reduce fall risk in bathrooms, bedrooms, entryways, hallways, and other transition points. As part of a full home accessibility modifications plan, grab bars work alongside handrails, lighting, flooring, wider clearances, and bathing upgrades to create a home that is easier to use now and more adaptable later.
If you are planning accessibility and mobility solutions, begin with a room-by-room assessment of the tasks that feel least stable. Identify where support is needed, verify structure before installation, and choose products designed for real load-bearing use. When needs are complex, bring in an occupational therapist or qualified accessibility professional. Start with the highest-risk areas, make the changes that deliver immediate function, and build a home that supports safe living for the long term.
Frequently Asked Questions
Where should grab bars be placed in the bathroom for the best safety and support?
The bathroom is usually the first place to add grab bars because it combines hard surfaces, tight spaces, and frequent transfers in and out of wet areas. In most homes, the highest-priority locations are next to the toilet, inside the shower or tub, and at the shower or tub entrance. A well-placed bar near the toilet can help with lowering, rising, and balance during transfers, which is especially important for older adults, people with arthritis, wheelchair users, and anyone recovering from surgery. In the shower, a horizontal bar along the side wall is often useful for steady support while standing, and another bar near the controls or entry can help with stepping in and out safely. For tubs, one bar may be positioned to assist with entering, while another supports standing or repositioning once inside.
Placement should match the person’s body size, strength, mobility, and how they actually use the space. There is no single “perfect” location for every home, which is why function matters more than guesswork. A bar that is too high, too low, or too far from the point of movement can be frustrating or even unsafe. It also matters that grab bars are anchored properly into wall framing or installed with approved mounting systems designed for the wall type. Towel bars and suction-cup products are not reliable substitutes for true grab bars. If the goal is long-term safety and independence, the best bathroom setup is one that supports real-life movements: sitting, standing, turning, stepping, and recovering balance before a slip becomes a fall.
Can grab bars be helpful in rooms other than the bathroom?
Yes, and this is one of the most overlooked parts of home accessibility. While bathrooms get the most attention, grab bars can improve safety and confidence in many other rooms. Near exterior doors, they can provide stability while stepping over thresholds, locking or unlocking the door, or managing packages and mobility devices at the same time. In hallways, they can offer a steady handhold in homes where balance is reduced or fatigue is common. Next to a bed, a properly placed bar can make it easier to change positions, sit up, stand, or transfer to a wheelchair or walker. In laundry rooms or kitchens, bars may help when standing for longer periods, turning, or moving between work zones.
Stairways, garages, and entry areas are also strong candidates, especially when there is a step down, uneven flooring, or limited room to maneuver. For some people, a grab bar in a hallway corner or near a frequently used chair can prevent the small loss of balance that leads to a major fall. The key is to look at where support is needed during everyday tasks, not just where falls are traditionally expected. A room-by-room assessment often reveals important opportunities to improve independence with very simple changes. In many homes, adding support outside the bathroom reduces strain, conserves energy, and helps people move more confidently through the entire house.
What is the difference between a grab bar and a regular towel bar or assist handle?
A true grab bar is a safety device engineered to support body weight and resist force during balance loss, transfers, and everyday movement. It is typically made from durable metal or other reinforced materials and installed with hardware meant to handle significant load when mounted correctly. A towel bar, decorative bathroom accessory, or lightweight assist handle may look similar at a glance, but it is not designed for the same purpose. Many accidents happen when someone reaches for a fixture that appears sturdy but pulls loose from the wall because it was never intended to bear weight.
This distinction matters a great deal in real homes. When a person starts to slip, they do not place gentle pressure on a bar; they often grab suddenly and with full force. That moment is exactly when an improperly rated product can fail. Suction-mounted bars may have a temporary role in very limited situations, but they should not be treated as a dependable fall-prevention solution. For anyone serious about accessibility and aging in place, the safer choice is a properly installed grab bar rated for support. It is also worth noting that modern grab bars come in a wide range of finishes and styles, so homeowners do not have to choose between safety and appearance. Many newer designs blend well with contemporary bathrooms and other living spaces while still providing the strength needed for real support.
How do you choose the right grab bar size, shape, and position for different needs?
The best grab bar is the one that supports a specific movement in a specific location for a specific person. Size, shape, and orientation all affect how useful a bar will be. Longer horizontal bars are often excellent for general balance support and for moving along a wall, while vertical bars can be especially helpful at entries and transition points because they give the hand an easy target at different heights. Angled bars may work well in some cases because they combine elements of both and can support natural wrist positioning during sit-to-stand movements. Diameter matters too. A bar should be easy to grip securely, especially for people with limited hand strength, arthritis, or reduced dexterity.
When choosing placement, it helps to think in terms of tasks rather than products. Is the bar meant to help someone rise from the toilet, step into a shower, pivot from a wheelchair, steady themselves while dressing, or navigate a narrow hallway? Each task suggests a different ideal location and orientation. Clearance from the wall is also important so the hand can wrap around the bar fully and comfortably. In many homes, the smartest approach is to evaluate the user’s height, reach, balance, and transfer style before installing anything. What works well for one person may be awkward for another. If there are multiple users in the home, placement may need to balance several needs. A thoughtful plan leads to better safety, easier daily routines, and fewer modifications later.
Should grab bars be installed by a professional, and what should homeowners watch out for?
In many cases, professional installation is the safest and most reliable option. A grab bar is only as strong as the way it is mounted, and proper installation requires more than simply drilling into drywall. The installer needs to understand wall construction, locate studs or use approved anchoring systems, avoid plumbing and electrical lines, and place the bar where it will genuinely help with movement. This is particularly important in bathrooms, where tile, waterproofing, and moisture exposure add complexity. A professionally installed bar can provide confidence that the hardware, location, and load support are appropriate for real use.
Homeowners should also be cautious about common mistakes. One is installing bars based only on standard diagrams without considering the actual user’s abilities and habits. Another is choosing placement that looks symmetrical or visually appealing but does not help during transfers or moments of instability. It is also a mistake to assume that any wall can support a bar in any location without reinforcement. If someone is returning home after surgery, coping with a new disability, or planning to age in place, it may be worth combining installation with a broader accessibility review of the home. That bigger picture can identify other hazards such as poor lighting, slippery flooring, narrow pathways, and difficult thresholds. Grab bars are simple devices, but when selected and installed thoughtfully, they become one of the most effective tools for reducing fall risk and supporting long-term independence.